Prep Time: 20 minutes | Rise Time: 1 hour | Cook Time: 15 minutes | Total Time: 1 hour 35 minutes | Serves: 8
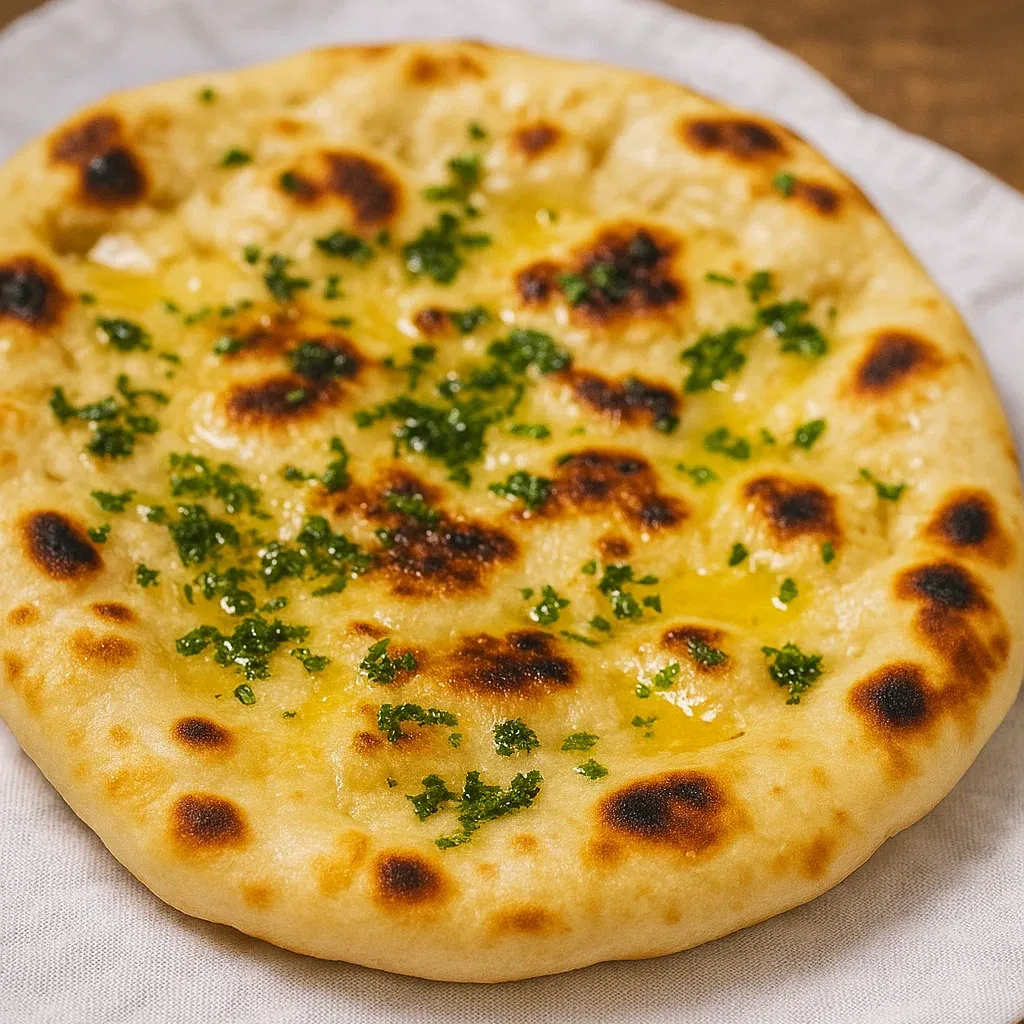
There’s something absolutely magical about pulling warm, pillowy homemade garlic naan bread from your own kitchen that rivals any Indian restaurant. This isn’t just bread – it’s an experience that fills your home with the most incredible aromas and creates those perfect moments when everyone gathers around the table. Making homemade garlic naan bread might seem intimidating, but I promise you, once you try this recipe, you’ll never want to buy store-bought naan again.
What sets this homemade garlic naan bread apart is the perfect balance of soft, chewy texture with bold garlic flavor that permeates every bite. Unlike many complicated recipes that require special ovens or equipment, this homemade garlic naan bread uses simple techniques and ingredients you likely already have in your kitchen.
Why This Homemade Garlic Naan Bread Will Change Your Cooking Game
The secret to exceptional homemade garlic naan bread lies in understanding a few key techniques that restaurant chefs use. First, the dough needs just the right amount of hydration to create that characteristic soft, stretchy texture. Second, the garlic needs to be prepared in multiple forms – minced raw garlic mixed into melted butter, and fresh garlic incorporated directly into the dough for layers of flavor.
This homemade garlic naan bread recipe creates that perfect combination of crispy edges and soft, pillowy centers that make restaurant naan so addictive. The garlic butter that gets brushed on both before and after cooking creates an irresistible golden crust that’s packed with aromatic garlic goodness.
Premium Ingredients for Perfect Homemade Garlic Naan Bread
For the Naan Dough:
- 2 cups all-purpose flour, plus extra for dusting (the foundation of tender homemade garlic naan bread)
- 1 teaspoon active dry yeast for that perfect rise and texture
- 1 teaspoon sugar to feed the yeast and add subtle sweetness
- ½ teaspoon salt for flavor balance and dough structure
- 2 tablespoons plain Greek yogurt (the secret to incredibly soft homemade garlic naan bread)
- 2 tablespoons olive oil for richness and pliability
- ¾ cup warm water (around 110°F) for activating the yeast
- 2 cloves garlic, minced for aromatic flavor throughout the dough
For the Garlic Butter Topping:
- 4 tablespoons unsalted butter, melted for the perfect garlic coating
- 4 cloves fresh garlic, minced (fresh is essential for the best homemade garlic naan bread)
- 2 tablespoons fresh cilantro, finely chopped for color and fresh flavor
- ½ teaspoon garlic powder for extra depth
- Pinch of salt to enhance all the flavors
Optional Garnishes:
- Flaky sea salt for finishing
- Extra fresh cilantro for serving
- Grated Parmesan cheese for a fusion twist on traditional homemade garlic naan bread
Step-by-Step Instructions for Perfect Homemade Garlic Naan Bread
Creating the Perfect Dough:
Step 1: Activate Your Yeast Like a Pro In a small bowl, combine the warm water, sugar, and active dry yeast. The water should feel comfortably warm on your wrist – too hot will kill the yeast, too cool won’t activate it properly. Let this mixture sit for 5-8 minutes until it becomes foamy and bubbly. This step is crucial for ensuring your homemade garlic naan bread will have that perfect, airy texture we’re after.
Step 2: Build Your Flavor Foundation In a large mixing bowl, whisk together the flour and salt. Create a well in the center and add the foamy yeast mixture, Greek yogurt, olive oil, and minced garlic. The yogurt is what gives this homemade garlic naan bread its signature tangy flavor and incredibly tender crumb – don’t skip it!
Step 3: Master the Mixing Technique Using a wooden spoon or your hands, gradually incorporate the flour into the wet ingredients. Start from the center and work your way out, creating a shaggy dough. Don’t worry if it looks messy at first – this is exactly what you want for perfect homemade garlic naan bread.
Developing the Perfect Texture:
Step 4: Knead to Perfection Turn the dough onto a lightly floured surface and knead for 8-10 minutes until it becomes smooth, elastic, and slightly tacky but not sticky. The dough should spring back when you poke it with your finger. This kneading develops the gluten structure that gives homemade garlic naan bread its characteristic chewy texture.
Step 5: Create the Ideal Rising Environment Place the kneaded dough in a lightly oiled bowl, turning it to coat all sides. Cover with a damp kitchen towel or plastic wrap and let rise in a warm, draft-free place for 1 hour, or until doubled in size. I like to turn my oven to its lowest setting for just 1 minute, then turn it off and place the bowl inside – perfect rising conditions for homemade garlic naan bread!
Step 6: Prepare Your Garlic Butter Magic While the dough rises, prepare your garlic butter by combining melted butter, minced garlic, chopped cilantro, garlic powder, and a pinch of salt in a small bowl. This aromatic mixture is what transforms ordinary bread into spectacular homemade garlic naan bread. Let it sit so the flavors meld together beautifully.
Shaping and Cooking Your Homemade Garlic Naan Bread:
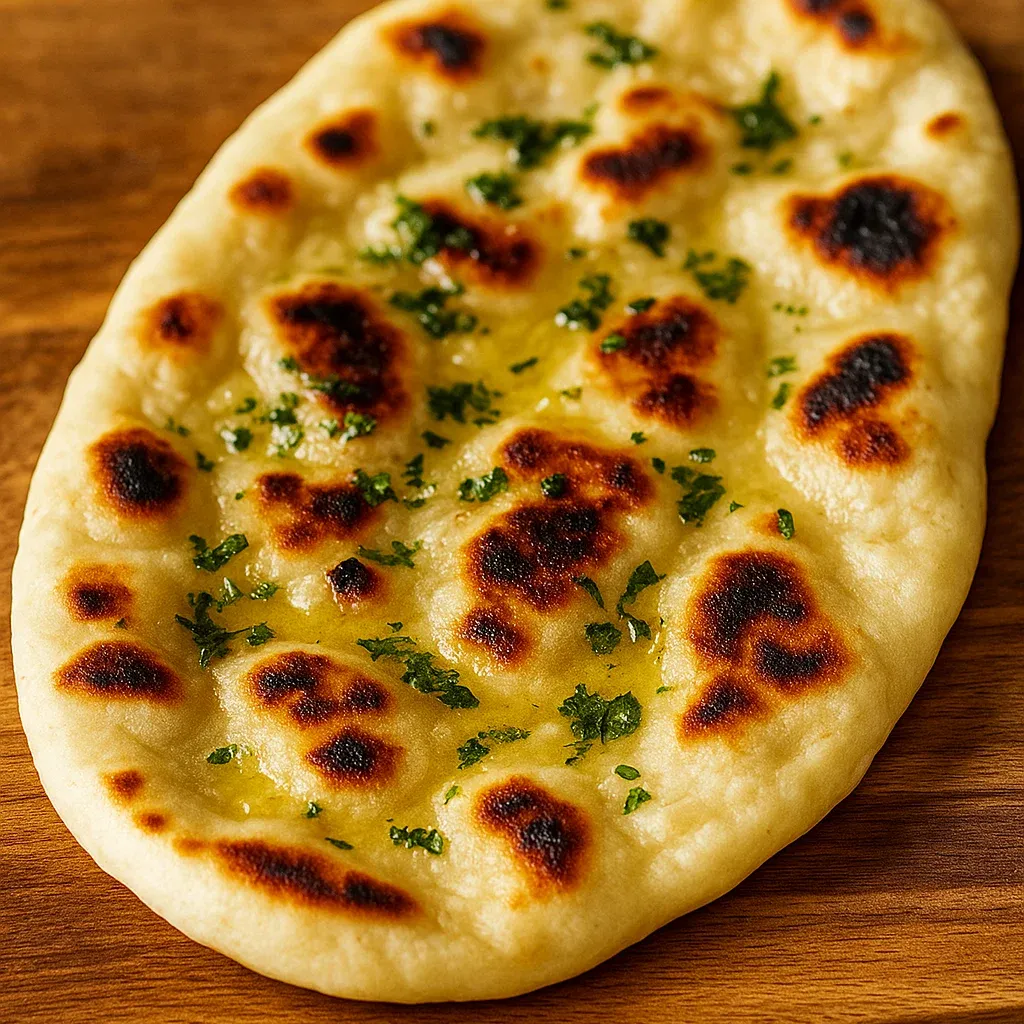
Step 7: Divide and Shape with Care Once risen, gently punch down the dough and turn it onto a lightly floured surface. Divide into 6-8 equal pieces, depending on how large you want your homemade garlic naan bread. Roll each piece into a ball, then use a rolling pin to create oval or teardrop shapes about ¼-inch thick.
Step 8: Perfect the Cooking Technique Heat a cast-iron skillet or heavy-bottomed pan over medium-high heat. Don’t use oil in the pan – the garlic butter will provide all the fat needed. Place one piece of shaped dough in the hot pan and cook for 1-2 minutes until bubbles form on the surface and the bottom develops golden-brown spots. This is when your kitchen starts smelling like the best Indian restaurant!
Step 9: Flip and Finish Like a Pro Flip the homemade garlic naan bread and cook for another 1-2 minutes until the second side is golden and spotted. Immediately brush the hot naan with your prepared garlic butter mixture, making sure to get into all the nooks and crannies. The heat will help the garlic infuse into the bread, creating layers of incredible flavor.
Expert Tips for Restaurant-Quality Homemade Garlic Naan Bread
Don’t Overwork the Dough: While kneading is important, overworking can make your homemade garlic naan bread tough. Stop kneading once the dough is smooth and elastic.
Temperature Control is Key: Your pan should be hot enough that a drop of water sizzles and evaporates quickly, but not so hot that the bread burns before cooking through.
Brush Immediately: Apply the garlic butter while the homemade garlic naan bread is still hot from the pan. This allows the flavors to penetrate the bread rather than just sitting on the surface.
Keep Them Warm: Stack finished naan and cover with a clean kitchen towel to keep them warm and soft while you cook the remaining pieces.
Fresh Garlic Makes All the Difference: Don’t substitute garlic powder for the fresh minced garlic in the butter – the fresh garlic provides that punch of flavor that makes this homemade garlic naan bread so special.
Perfect Pairings and Serving Suggestions
This versatile homemade garlic naan bread elevates any meal from ordinary to extraordinary. Serve it alongside your favorite curry dishes, use it to scoop up hearty stews, or even enjoy it as an appetizer with various dipping sauces. The possibilities are endless!
Complete Your Indian-Inspired Feast:
Transform your homemade garlic naan bread into the centerpiece of an amazing dining experience with these complementary dishes:
- Hearty Main Dishes – Discover aromatic curry recipes and spiced proteins that pair perfectly with fresh homemade garlic naan bread
- Flavored Dips & Marinades – Explore yogurt-based raitas and spicy chutneys that complement the rich garlic flavors in your bread
- Fresh Vibrant Salads – Try cucumber salads and fresh herb combinations that balance the richness of homemade garlic naan bread
- Perfect Sides – Find rice dishes and vegetable sides that complete your Indian feast featuring this incredible bread
- Dinner Delights – Browse complete dinner menus that showcase homemade garlic naan bread as the perfect accompaniment
Storage and Make-Ahead Tips
One of the best things about this homemade garlic naan bread recipe is how well it adapts to different schedules. The dough can be made up to 24 hours in advance and stored in the refrigerator, which actually improves the flavor as the yeast develops more complex notes.
Finished homemade garlic naan bread can be stored at room temperature for up to 2 days wrapped in a clean kitchen towel. For longer storage, wrap individually in plastic wrap and freeze for up to 3 months. To reheat, wrap frozen naan in damp paper towels and microwave for 30-45 seconds, or warm in a 350°F oven for 5-8 minutes.
Creative Variations for Your Homemade Garlic Naan Bread
Once you master the basic technique, you can customize your homemade garlic naan bread in countless ways. Try adding fresh herbs like rosemary or thyme to the dough, or incorporate different spices like nigella seeds or sesame seeds for texture and flavor.
For a cheesy twist, sprinkle grated mozzarella or Parmesan cheese on the naan during the last minute of cooking. You can also experiment with different garlic preparations – roasted garlic creates a mellower, sweeter flavor, while garlic confit adds luxurious richness to your homemade garlic naan bread.
Troubleshooting Common Issues
If your homemade garlic naan bread turns out dense, the most likely culprit is inactive yeast or over-kneaded dough. Always test your yeast with warm water and sugar first, and remember that the dough should feel slightly tacky, not completely smooth.
If the bread is cooking too quickly on the outside but remaining raw inside, lower your heat. The goal is to cook the homemade garlic naan bread through evenly while developing those beautiful golden spots that indicate proper caramelization.
The Science Behind Perfect Homemade Garlic Naan Bread
Understanding why this recipe works helps you become a better baker. The yogurt provides lactic acid that tenderizes the gluten, creating that characteristic soft texture. The combination of yeast and the slight acidity from yogurt creates complex flavors that develop during fermentation.
The high heat cooking method mimics the traditional tandoor oven, creating rapid steam that puffs the bread while simultaneously developing the crispy, spotted exterior that makes homemade garlic naan bread so appealing.
Why This Recipe Will Become Your Go-To
What makes this homemade garlic naan bread recipe special isn’t just the incredible taste – it’s the accessibility. You don’t need a tandoor oven or special equipment. You don’t need hard-to-find ingredients or years of bread-making experience. You just need basic pantry staples and a willingness to try something new.
This homemade garlic naan bread bridges the gap between authentic flavors and home kitchen practicality. It’s the kind of recipe that makes you feel like a culinary genius when guests ask for the recipe, but secretly you know it’s much easier than it looks.
Every time I make this homemade garlic naan bread, I’m reminded of why cooking at home is so rewarding. There’s something deeply satisfying about creating restaurant-quality food in your own kitchen, especially when it’s something as beloved as garlic naan. The process is meditative, the results are spectacular, and the memories created around the dinner table are priceless.
Whether you’re planning an elaborate Indian feast or just want to elevate a simple weeknight dinner, this homemade garlic naan bread will exceed your expectations every single time.
Ready to explore more amazing bread recipes and international flavors? Check out our Tasty Snacks and Refreshing Beverages to create the perfect meal around your incredible homemade garlic naan bread.