Prep Time: 15 minutes | Cook Time: 35 minutes | Total Time: 50 minutes
Why Cherry Pie Bars Are the Perfect Dessert Choice
Cherry pie bars represent the perfect marriage of convenience and indulgence. Unlike traditional pies that require precise pastry techniques, these bars use a simple drop-dough method that anyone can master. The result is a dessert that’s incredibly portable, easy to serve, and guaranteed to please crowds of all ages.
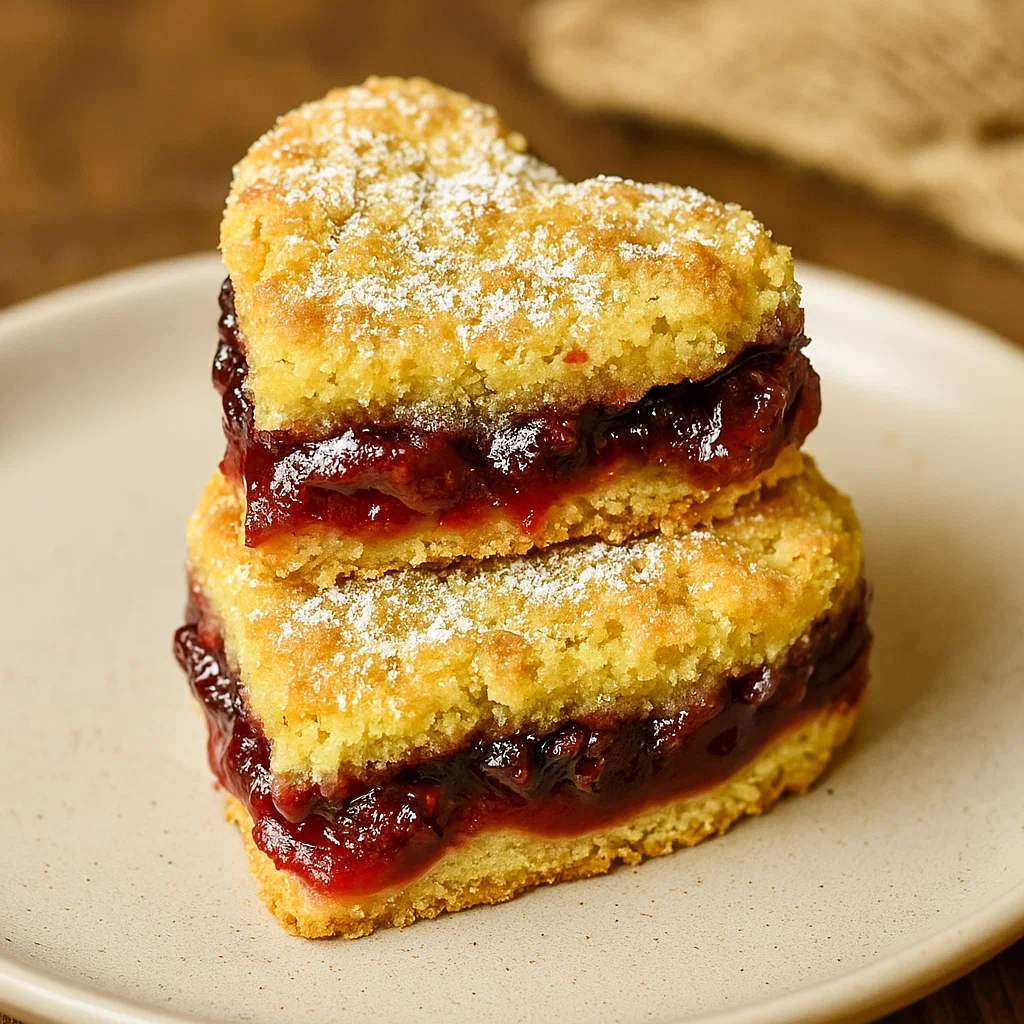
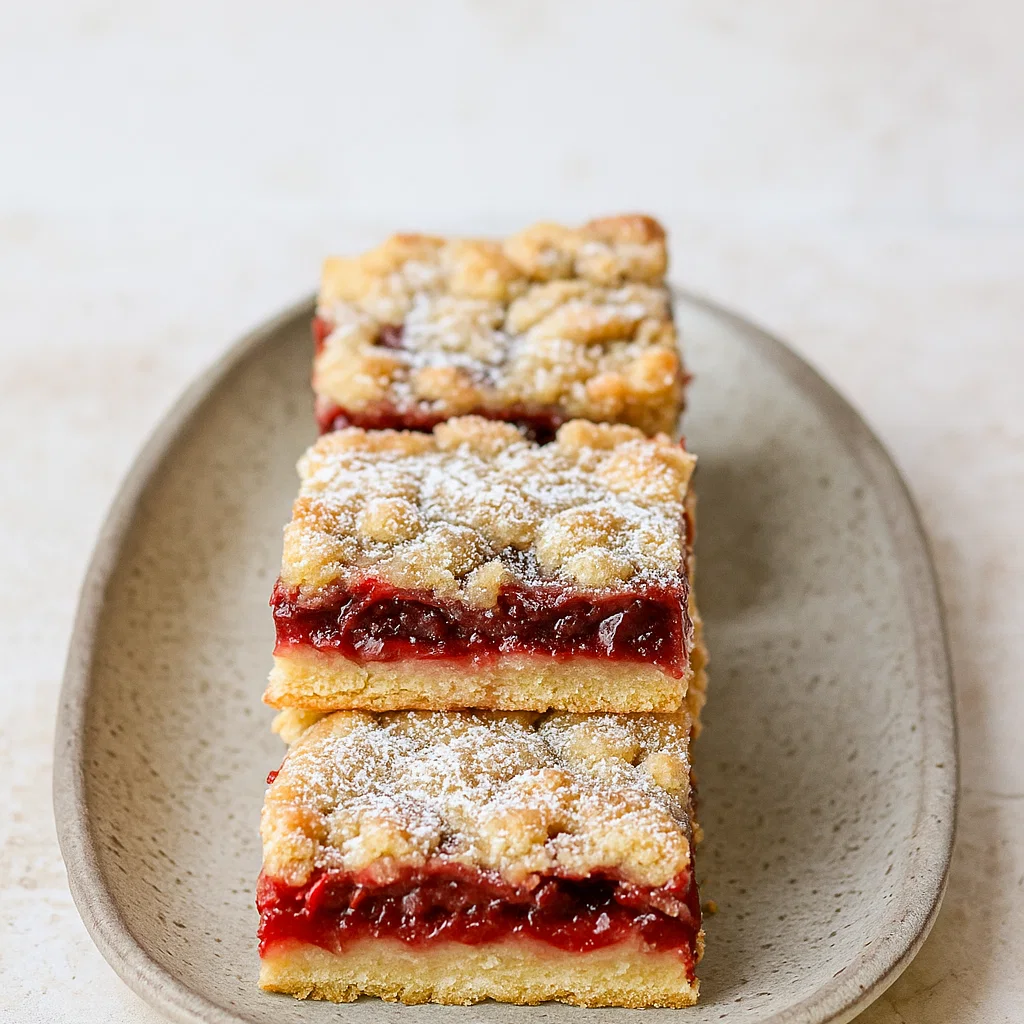
The beauty of cherry pie bars lies in their versatility. They’re equally at home at a casual picnic or an elegant dinner party. The vibrant red cherries peeking through the golden crumbly topping create a visually stunning presentation that’s sure to impress your guests. Plus, they can be made ahead of time, making them ideal for busy hosts who want to prepare desserts in advance.
The Secret to Perfect Cherry Pie Bars
The key to exceptional cherry pie bars lies in achieving the perfect balance between the buttery crust, flavorful filling, and tender crumb topping. Our recipe creates a sturdy yet tender base that won’t become soggy, while the carefully spiced cherry filling provides just the right amount of sweetness and tartness. The crumbly topping adds textural interest and a beautiful golden finish that makes these bars irresistible.
Essential Ingredients for Cherry Pie Bars
For the Crust and Topping:
- 1 cup (2 sticks) unsalted butter, softened – The foundation of flavor and texture. Room temperature butter creams beautifully and creates that perfect tender crumb we’re after.
- 1 cup granulated sugar – Provides sweetness and helps create the golden color during baking.
- 2 large eggs, room temperature – These bind everything together and add richness to the final product.
- 1 teaspoon pure vanilla extract – Essential for depth of flavor.
- 1/2 teaspoon almond extract – This is the secret ingredient that elevates cherry pie bars from good to extraordinary. The almond complements the cherry beautifully.
- 2 cups all-purpose flour – The structure of our bars comes from this simple pantry staple.
- 1/2 teaspoon salt – Enhances all the other flavors and prevents the bars from tasting flat.
For the Filling:
- 1 can (21 oz) cherry pie filling – Choose a high-quality brand for the best flavor, or use homemade if you have fresh cherries available.
For the Glaze:
- 1 cup powdered sugar – Creates a smooth, sweet finish.
- 2-3 tablespoons whole milk – Helps achieve the perfect drizzling consistency.
- 1/2 teaspoon vanilla extract – Adds flavor to the glaze.
- 1/4 teaspoon almond extract – Continues the almond theme throughout the dessert.
Step-by-Step Instructions for Cherry Pie Bars
Preparation:
Begin by preheating your oven to 350°F (175°C). Line a 9×13 inch baking pan with parchment paper, leaving some overhang for easy removal. Lightly grease the parchment paper to ensure nothing sticks.
Creating the Base:
In a large mixing bowl, cream the softened butter and granulated sugar together using an electric mixer on medium speed. This process should take about 3-4 minutes, and you’ll know it’s ready when the mixture becomes light and fluffy with a pale yellow color. The key here is patience – proper creaming creates air pockets that result in a tender texture.
Add the eggs one at a time, beating well after each addition. This ensures proper incorporation and prevents the mixture from curdling. Next, blend in the vanilla and almond extracts, mixing just until combined.
In a separate bowl, whisk together the flour and salt. Gradually add this dry mixture to the butter mixture, mixing on low speed until just combined. Overmixing at this stage can result in tough bars, so stop as soon as the flour disappears.
Assembly:
Measure out 3 cups of the prepared dough and spread it evenly across the bottom of your prepared baking pan. Use your hands or the back of a spoon to press it firmly into an even layer – this will be your crust.
Spread the cherry pie filling evenly over the crust, making sure to distribute the cherries throughout. Try to get the filling right to the edges for consistent flavor in every bite.
Take the remaining dough and drop it by spoonfuls over the cherry filling. Don’t worry about making it perfectly even – the rustic, slightly uneven appearance is part of the charm of these bars. The dough will spread slightly during baking, creating a beautiful textured top.
Baking:
Place the pan in your preheated oven and bake for 30-35 minutes, or until the top is golden brown and the filling is bubbling around the edges. The bars should feel set when lightly touched in the center.
Remove from the oven and allow to cool completely in the pan – this is crucial for clean cuts and proper setting of the filling. Resist the temptation to cut into them while warm, as the filling needs time to thicken.
Finishing Touch:
While the bars cool, prepare the glaze by whisking together the powdered sugar, milk, vanilla, and almond extract until smooth. The consistency should be thick enough to hold its shape but thin enough to drizzle easily. Adjust with more milk or powdered sugar as needed.
Once the bars are completely cool, drizzle the glaze over the top in a decorative pattern. Allow the glaze to set for about 10 minutes before cutting into squares.
Pro Tips for Perfect Cherry Pie Bars
Room Temperature Ingredients: Ensure your butter and eggs are at room temperature for the best texture. Cold ingredients won’t cream properly and can result in dense bars.
Don’t Overbake: Watch for the golden brown color and bubbling edges. Overbaking will result in dry, tough bars rather than the tender texture we’re aiming for.
Complete Cooling: Patience is essential here. Cherry pie bars need to cool completely before cutting to achieve clean, professional-looking squares.
Storage: These bars keep well covered at room temperature for up to 3 days or in the refrigerator for up to a week. They also freeze beautifully for up to 3 months.
Delicious Variations to Try
While classic cherry pie bars are perfection on their own, there are several delicious variations worth exploring:
Mixed Berry Bars: Substitute the cherry filling with a combination of blueberry and strawberry pie filling for a patriotic twist.
Peach Pie Bars: Use peach pie filling and add a pinch of cinnamon to the crust for a summery variation.
Apple Cinnamon Bars: Apple pie filling with additional cinnamon and a touch of nutmeg creates a perfect fall dessert.
Perfect Pairings and Serving Suggestions
Cherry pie bars are delicious on their own, but they pair beautifully with vanilla ice cream or fresh whipped cream. For special occasions, try serving them with a dollop of mascarpone cheese or a small scoop of almond ice cream to complement the almond extract in the recipe.
These bars are perfect for potluck dinners, bake sales, or any gathering where you need a crowd-pleasing dessert. They transport well and can be served at room temperature, making them ideal for outdoor events and picnics.
Nutritional Information
Each serving of these cherry pie bars provides approximately 280 calories, with a good balance of carbohydrates for energy and fats for satisfaction. While they’re definitely a treat, the cherry filling does provide some vitamin C and antioxidants.
Make-Ahead Tips
One of the greatest advantages of cherry pie bars is their make-ahead potential. You can prepare them completely up to 2 days in advance, storing them covered at room temperature. For longer storage, wrap individual bars in plastic wrap and freeze for up to 3 months. They thaw beautifully at room temperature in about 30 minutes.
Related Recipes You’ll Love
If you enjoyed these cherry pie bars, you might also love exploring other delicious recipes on our site:
- Perfect Sides – Discover amazing side dishes that complement any meal
- Irresistible Desserts – More sweet treats to satisfy your dessert cravings
- Hearty Main Dishes – Satisfying meals for every occasion
- Breakfast Favorites – Start your day right with these delicious options
- Tasty Snacks – Perfect bites for any time of day
- Refreshing Beverages – Drinks to complement your desserts
- Fresh Vibrant Salads – Light options to balance rich desserts
- Flavored Dips & Marinades – Add flavor to any dish
- Dinner Delights – End your meal with these cherry pie bars
Final Thoughts
Cherry pie bars represent everything wonderful about homemade desserts – they’re approachable, delicious, and bring people together. This recipe delivers consistent results every time, making it a reliable addition to your dessert repertoire. The combination of buttery crust, sweet cherry filling, and elegant glaze creates a dessert that feels special without being complicated.
Whether you’re a seasoned baker or just starting your culinary journey, these cherry pie bars are sure to become a favorite. They embody the perfect balance of simplicity and sophistication, making them suitable for any occasion. So gather your ingredients, preheat your oven, and get ready to create a dessert that will have everyone asking for the recipe.
The beauty of cherry pie bars lies not just in their delicious taste, but in their ability to bring joy to both the baker and those lucky enough to enjoy them. Each bite delivers a perfect combination of textures and flavors that reminds us why homemade desserts are so special. Make these bars for your next gathering, and watch as they disappear – along with any doubts about your baking abilities!

