Prep Time: 15 minutes | Cook Time: 20 minutes | Total Time: 35 minutes
What Makes These Cheeseburger Biscuit Bombs Special
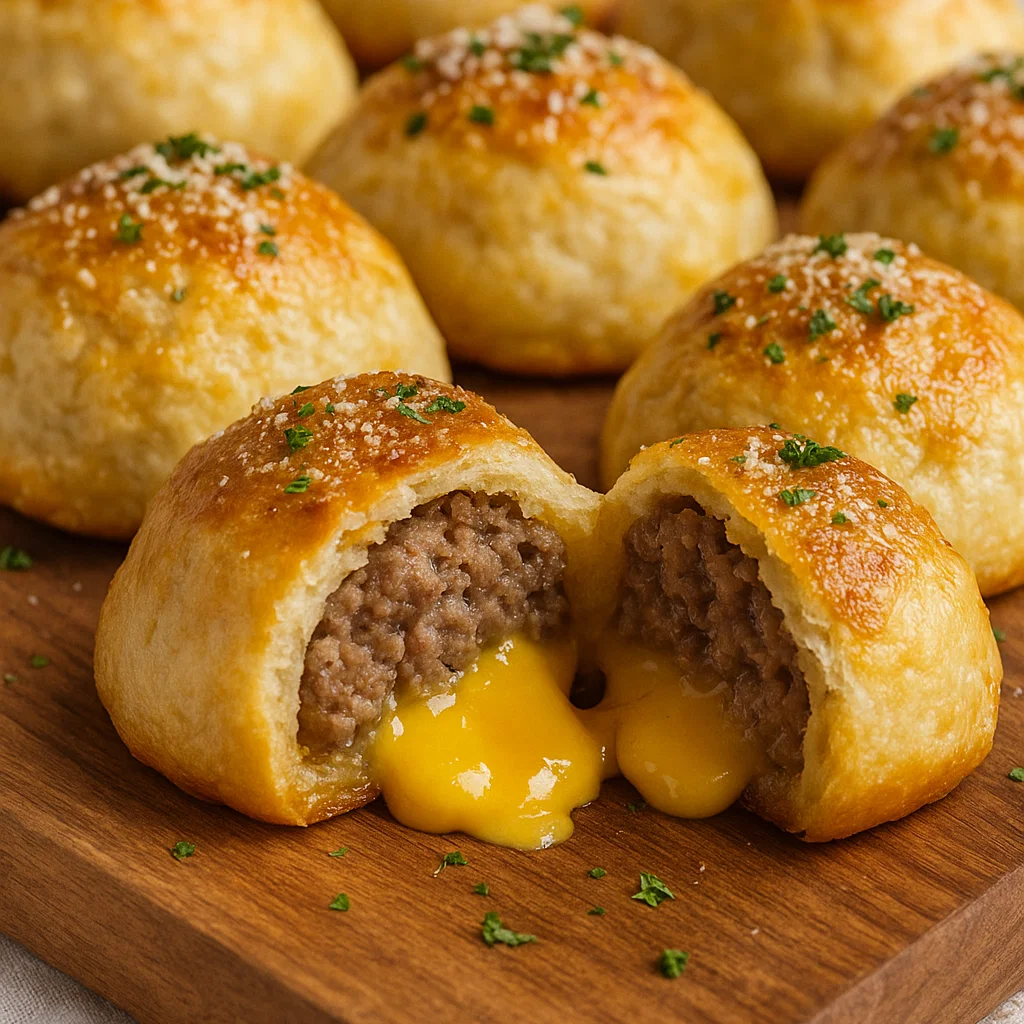
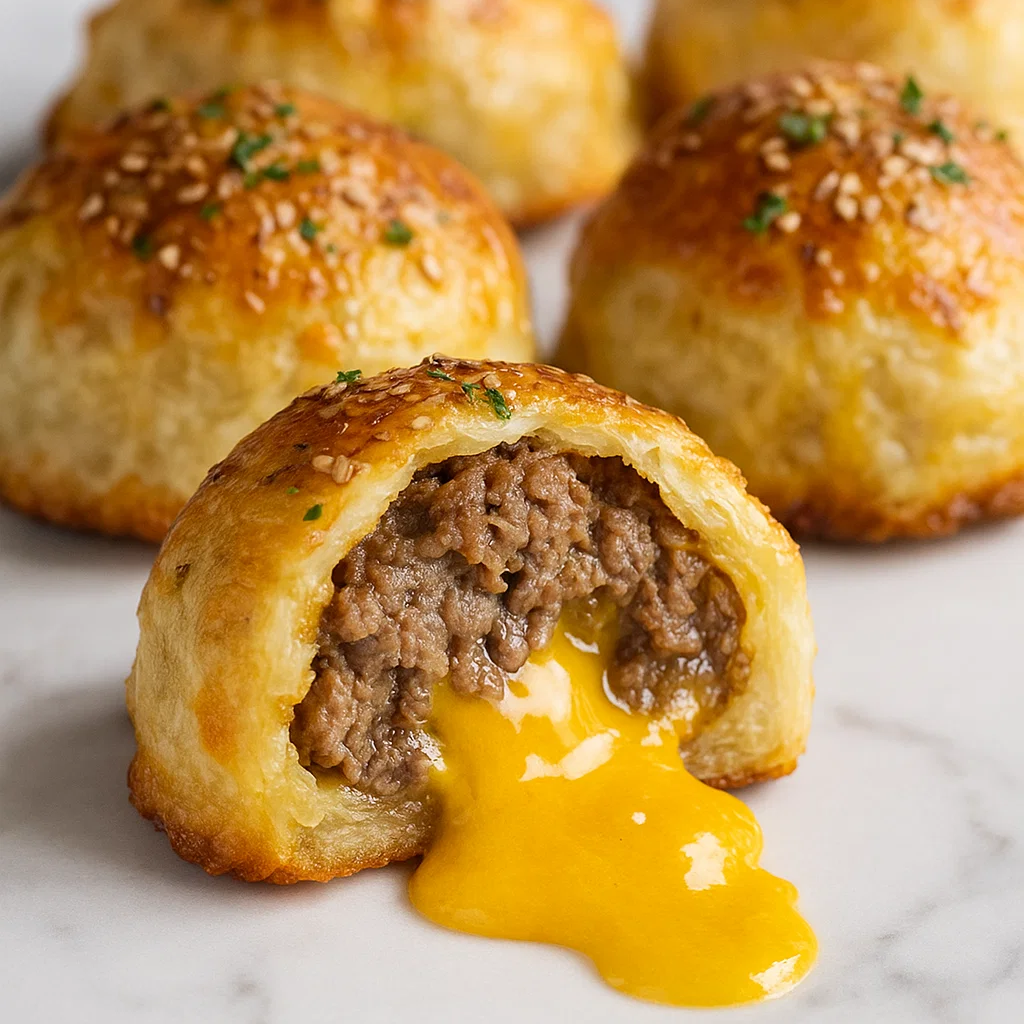
These aren’t your ordinary appetizers. Each cheeseburger biscuit bomb is carefully crafted to capture the essence of a classic American cheeseburger in a convenient, mess-free package. The magic happens when the biscuit dough transforms into a golden, pillowy exterior while the filling stays warm and gooey inside.
What sets this recipe apart is the perfect balance of flavors. The seasoned ground beef provides that authentic burger taste, while the melted cheddar cheese creates those irresistible cheese pulls. The addition of crispy bacon elevates these from good to absolutely phenomenal, and the subtle hint of pickles adds that classic burger shop tang.
Ingredients You’ll Need
For the Filling:
- 1 lb ground beef (80/20 blend for best flavor)
- 6 strips bacon, cooked and crumbled
- 1 small onion, finely diced
- 2 cloves garlic, minced
- 1 tsp salt
- 1/2 tsp black pepper
- 1 tsp garlic powder
- 1 tsp onion powder
- 2 tbsp Worcestershire sauce
- 2 tbsp ketchup
- 1 tbsp yellow mustard
- 1 cup sharp cheddar cheese, shredded
- 1/4 cup dill pickle relish (optional)
For the Biscuit Bombs:
- 2 cans (16.3 oz each) refrigerated biscuit dough
- 3 tbsp butter, melted
- 1 tbsp sesame seeds
- 1 egg, beaten (for egg wash)
Step-by-Step Instructions
Preparing the Filling
Start by preheating your oven to 375°F and lining a large baking sheet with parchment paper. This temperature ensures the biscuits cook evenly while giving you that perfect golden-brown exterior.
Heat a large skillet over medium-high heat and cook the bacon until it’s perfectly crispy. Remove the bacon and set it aside, but leave about 1 tablespoon of bacon grease in the pan – this will add incredible flavor to your beef mixture.
Add the diced onion to the hot skillet and sauté for 2-3 minutes until it becomes fragrant and translucent. The onions should be soft but not browned, as they’ll continue cooking in the oven.
Next, add the ground beef to the skillet with the onions. Break it up with a wooden spoon as it cooks, creating small, uniform crumbles. Cook for 5-7 minutes until no pink remains. The key here is to get a good sear on the meat without overcooking it, as it will finish cooking in the oven.
Cheeseburger Biscuit Bombs
Drain any excess fat from the skillet, then return it to medium heat. Add the minced garlic and cook for just 30 seconds until fragrant – be careful not to burn it. Now add all your seasonings: salt, pepper, garlic powder, onion powder, and Worcestershire sauce. Stir everything together and cook for another minute to let the flavors meld.
Remove the skillet from heat and stir in the ketchup, mustard, and pickle relish if using. The mixture should be well-combined and aromatic. Let it cool for about 5 minutes – this cooling step is crucial because if you add the cheese while the mixture is too hot, it will melt completely and won’t give you those delicious pockets of gooey cheese.
Once cooled, fold in the crumbled bacon and shredded cheese. The filling should hold together when pressed but not be too wet or dry.Cheeseburger Biscuit Bombs
Assembling the Bombs
Cheeseburger Biscuit Bombs
Remove the biscuit dough from the cans and separate into individual pieces. Let them sit at room temperature for about 5 minutes – this makes them easier to work with and prevents tearing.
On a lightly floured surface, use a rolling pin to flatten each biscuit into a circle about 4-5 inches in diameter. Don’t roll them too thin, as they need to hold the filling without breaking.
Place approximately 2-3 tablespoons of the beef mixture in the center of each flattened biscuit. Be generous but not overly so – you want enough filling to make each bite satisfying, but not so much that the biscuit can’t seal properly.
Here’s where the magic happens: carefully bring the edges of the biscuit dough up and over the filling, pinching them together at the top to create a sealed pouch. Make sure to pinch the seams well to prevent the filling from leaking out during baking. The finished bombs should look like little dumplings.
Cheeseburger Biscuit Bombs
Place each sealed bomb seam-side down on your prepared baking sheet, leaving about 2 inches between each one to allow for expansion during baking.
Cheeseburger Biscuit Bombs
Baking to Perfection
Brush the tops of each cheeseburger biscuit bomb with beaten egg – this creates that beautiful golden-brown color and helps the sesame seeds stick. Then brush with melted butter for extra richness and flavor.
Cheeseburger Biscuit Bombs
Sprinkle the tops with sesame seeds to mimic burger buns. This small detail makes a big difference in both appearance and taste.
Cheeseburger Biscuit Bombs
Bake for 18-22 minutes, or until the biscuits are golden brown and cooked through. The internal temperature should reach 165°F. Don’t open the oven door too frequently during baking, as this can cause the biscuits to deflate.
Let them cool for just 2-3 minutes before serving – they’ll be extremely hot inside, but you won’t be able to resist diving in!
Pro Tips for Perfect Results
The secret to exceptional cheeseburger biscuit bombs lies in the details. Use 80/20 ground beef for the perfect balance of flavor and moisture. Leaner beef can result in dry filling, while fattier beef can make the bombs greasy.
Don’t skip the cooling step after cooking the beef mixture. Adding cheese to hot meat will cause it to melt completely, rather than creating those desirable pockets of gooey cheese that make each bite special.
When sealing the biscuits, make sure to remove as much air as possible from inside the pouch. This prevents the bombs from bursting open during baking and ensures even cooking.
For extra flavor, try brushing the finished bombs with garlic butter instead of plain melted butter. Simply mix melted butter with minced garlic and a pinch of salt.
Serving Suggestions and Pairings
These cheeseburger biscuit bombs are incredibly versatile. Serve them as appetizers at your next party with small bowls of ketchup, mustard, and ranch dressing for dipping. They’re also substantial enough to serve as a main course alongside crispy perfect sides like golden french fries or onion rings.
For a complete meal experience, pair them with fresh vibrant salads to balance the richness of the bombs. A simple caesar salad or coleslaw works beautifully.
Don’t forget the beverages! These bombs pair wonderfully with refreshing beverages like ice-cold sodas, craft beers, or even milkshakes for the ultimate nostalgic experience.
Storage and Reheating
Leftover cheeseburger biscuit bombs can be stored in the refrigerator for up to 3 days. To reheat, place them on a baking sheet and warm in a 350°F oven for 8-10 minutes, or until heated through. Avoid microwaving, as this can make the biscuit dough soggy.
For longer storage, these bombs freeze beautifully. Wrap individually in plastic wrap and freeze for up to 3 months. To reheat from frozen, bake at 350°F for 15-20 minutes.
Customization Ideas
The beauty of cheeseburger biscuit bombs lies in their adaptability. Try adding jalapeños for heat, or swap the cheddar for pepper jack cheese. Mushroom lovers can add sautéed mushrooms to the filling, while those who enjoy tasty snacks with international flair might experiment with different cheese varieties.
For breakfast lovers, consider making a morning version with scrambled eggs, breakfast sausage, and cheese – perfect for breakfast favorites that the whole family will enjoy.
Perfect for Any Occasion
Whether you’re planning dinner delights for the family or need impressive hearty main dishes for entertaining, these cheeseburger biscuit bombs deliver every time. They’re kid-friendly, adult-approved, and guaranteed to be the star of any gathering.
The combination of convenience and flavor makes these bombs ideal for busy weeknights when you want something special without spending hours in the kitchen. They’re also perfect for game day parties, potluck dinners, or any time you want to serve something that’s both familiar and exciting.
Final Thoughts
These cheeseburger biscuit bombs represent the perfect marriage of comfort food classics. They take everything we love about cheeseburgers and transform it into something new and exciting. With their golden, buttery exterior and flavor-packed interior, they’re sure to become a regular in your recipe rotation.
The best part? They’re incredibly forgiving. Even if your first attempt isn’t perfect, they’ll still be delicious. With practice, you’ll develop your own techniques for sealing and shaping that work best for you.
So fire up that oven, gather your ingredients, and get ready to create something truly special. These cheeseburger biscuit bombs aren’t just a recipe – they’re a guaranteed crowd-pleaser that will have everyone asking for seconds and begging for the recipe.

