Prep Time: 25 minutes | Total Time: 3 hours (including chilling)
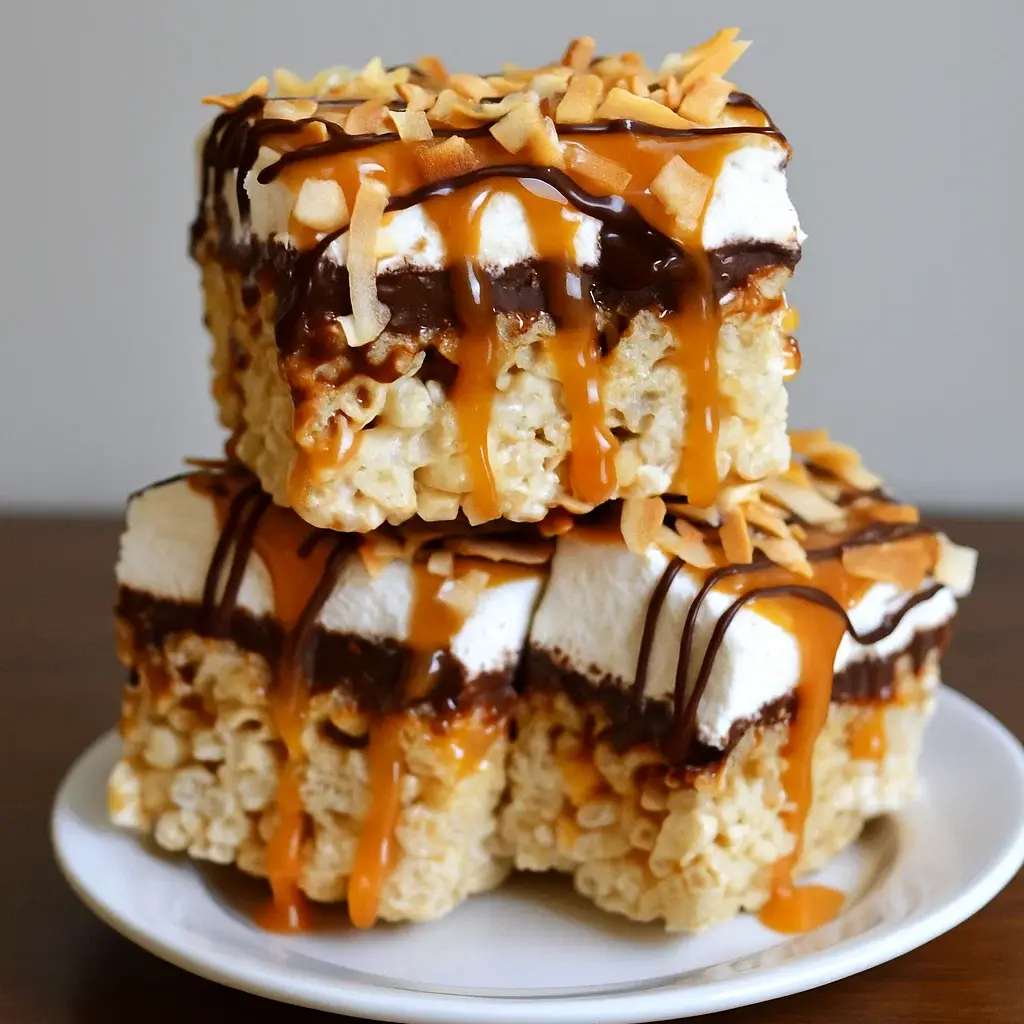
There’s something absolutely magical about transforming two beloved treats into one spectacular dessert. These Samoa Rice Krispie Bars capture everything we adore about the classic Girl Scout cookies while delivering that perfect chewy, crispy texture we crave from traditional rice krispie treats. When I first created these bars, my kitchen filled with the most incredible aroma of toasted coconut and warm caramel – and I knew I had something truly special.
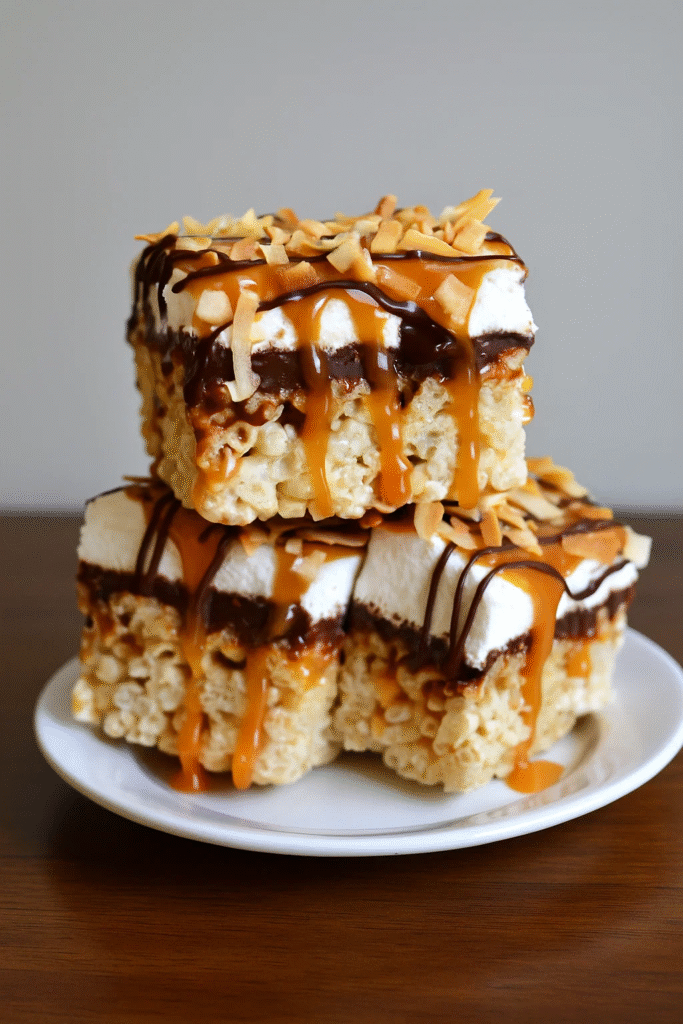
What makes these Samoa Rice Krispie Bars extraordinary isn’t just their incredible taste, but how they bring together multiple textures and flavors in every single bite. You’ll experience the satisfying crunch of the rice cereal base, followed by the sweet chewiness of caramel and toasted coconut, all finished with a rich chocolate coating that ties everything together beautifully.
Why These Samoa Rice Krispie Bars Are Irresistible
Unlike store-bought Girl Scout cookies that appear only during cookie season, these homemade Samoa Rice Krispie Bars can be enjoyed year-round. They’re surprisingly simple to prepare, requiring no specialized baking skills or fancy equipment. The combination of familiar ingredients creates something that tastes incredibly sophisticated while remaining completely approachable for home bakers of all levels.
Each bar delivers that perfect balance of sweet and salty, with the toasted coconut providing a subtle nutty flavor that complements the rich caramel beautifully. The chocolate doesn’t overpower – instead, it acts as the perfect finishing touch that brings all the flavors together harmoniously.
Essential Ingredients for Perfect Samoa Rice Krispie Bars
For the Rice Krispie Base:
- 6 cups Rice Krispies cereal – The foundation that provides that signature crispy texture
- 4 tablespoons butter – Creates the perfect binding consistency
- 4 cups mini marshmallows – The secret to achieving that ideal chewy texture
- 1/4 teaspoon vanilla extract – Enhances all the other flavors beautifully
- Pinch of sea salt – Balances the sweetness and makes every flavor pop
For the Samoa Topping:
- 2 cups sweetened shredded coconut – Must be toasted for that authentic nutty flavor
- 1 cup soft caramel candies (or 3/4 cup caramel sauce)
- 2 tablespoons heavy cream – Creates the perfect caramel consistency
- 1 1/2 cups milk chocolate chips – For dipping and drizzling
- 2 tablespoons coconut oil – Helps create smooth, glossy chocolate
Step-by-Step Instructions for Samoa Rice Krispie Bars
Preparing Your Workspace
Begin by lining an 8×8 inch square baking pan with parchment paper, leaving some overhang for easy removal later. Lightly grease the parchment with cooking spray – this simple step will save you so much frustration when it’s time to cut your bars.
Creating the Perfect Rice Krispie Base
Step 1: In a large microwave-safe bowl, combine the butter and marshmallows. Microwave in 30-second intervals, stirring after each, until the mixture is completely smooth and melted. This usually takes about 90 seconds total, but watch carefully to prevent overheating.
Step 2: Immediately stir in the vanilla extract and sea salt, mixing until everything is well combined. The mixture should be smooth and glossy.
Step 3: Working quickly, add the Rice Krispies cereal and fold gently until every piece is evenly coated with the marshmallow mixture. Don’t overmix – you want to maintain the cereal’s crispy texture.
Step 4: Press the mixture firmly into your prepared pan using slightly damp hands or a piece of parchment paper. Create an even layer that reaches all corners. Allow to cool completely while you prepare the topping.
Toasting Coconut to Perfection
Step 5: Preheat your oven to 350°F. Spread the shredded coconut evenly on a parchment-lined baking sheet. Toast for 8-12 minutes, stirring every 3-4 minutes to ensure even browning. The coconut is ready when it’s golden brown and fragrant. Set aside 1/2 cup of the toasted coconut for final garnishing.
Preparing the Caramel Layer
Step 6: If using caramel candies, unwrap them and place in a microwave-safe bowl with the heavy cream. Microwave in 30-second intervals, stirring after each, until smooth and melted. If using prepared caramel sauce, simply warm it slightly to make it easier to spread.
Step 7: Stir 1 1/2 cups of the toasted coconut into the warm caramel until evenly distributed. Spread this mixture evenly over the cooled rice krispie base.
Adding the Chocolate Finish
Step 8: Melt 1 cup of the chocolate chips with 1 tablespoon of coconut oil using the same microwave method. Stir until completely smooth and glossy.
Step 9: Spread the melted chocolate evenly over the caramel-coconut layer. Immediately sprinkle with the reserved toasted coconut while the chocolate is still wet.
Step 10: Melt the remaining chocolate chips with the remaining coconut oil for drizzling. Using a fork or spoon, create beautiful chocolate drizzles across the surface of your bars.
Final Setting
Refrigerate the completed Samoa Rice Krispie Bars for at least 2 hours, or until the chocolate is completely set. For clean cuts, use a sharp knife wiped clean between each slice.
Pro Tips for the Best Samoa Rice Krispie Bars
Toast coconut in small batches – This ensures even browning and prevents burning. Coconut can go from perfectly golden to burnt in seconds, so watch it carefully.
Work quickly with caramel – Caramel sets fast as it cools, so have everything ready before you start spreading it over your bars.
Use room temperature ingredients – This helps everything blend together more smoothly and creates better texture.
Don’t skip the salt – That tiny pinch enhances every other flavor and creates the perfect sweet-salty balance.
Storage and Serving Suggestions
Store your finished Samoa Rice Krispie Bars in an airtight container at room temperature for up to 5 days, or refrigerate for up to one week. For longer storage, wrap individual bars in plastic wrap and freeze for up to 3 months.
These bars are perfect for potluck dinners, bake sales, holiday parties, or any time you want to impress friends and family with a homemade treat that looks and tastes absolutely professional.
Internal Links Section: More Delicious Recipes to Try
If you loved these Samoa Rice Krispie Bars, you’ll definitely want to explore more amazing recipes on our site:
- Perfect Sides – Discover complementary sides that pair beautifully with sweet treats
- Irresistible Desserts – Explore our complete collection of show-stopping desserts
- Tasty Snacks – Find more easy-to-make treats perfect for any time of day
- Refreshing Beverages – Discover drinks that perfectly complement these rich, sweet bars
- Breakfast Favorites – Start your day with equally delicious morning treats
Frequently Asked Questions About Samoa Rice Krispie Bars
Q: Can I make these bars ahead of time?
A: Absolutely! These Samoa Rice Krispie Bars actually taste even better the next day as the flavors have time to meld together. Just store them covered at room temperature.
Q: What if I can’t find caramel candies?
A: No problem! Use prepared caramel sauce from the ice cream aisle, or even make your own caramel if you’re feeling adventurous.
Q: Can I use different types of chocolate?
A: Definitely! Dark chocolate creates a more sophisticated flavor, while white chocolate offers a sweeter finish. Semi-sweet chocolate chips work perfectly too.
Q: How do I prevent the bars from sticking to the pan?
A: Always line your pan with parchment paper and lightly grease it. This makes removal effortless and ensures clean cuts.
The Perfect Ending to Any Meal
These Samoa Rice Krispie Bars represent everything we love about creative home baking – they’re familiar yet exciting, simple yet impressive, and absolutely irresistible to anyone who tries them. Whether you’re making them for a special occasion or just because you deserve something wonderful, these bars deliver pure happiness in every bite.
The beauty of this recipe lies not just in its incredible taste, but in how it brings people together. There’s something special about sharing homemade treats that were made with love and attention to detail. Every time I make these Samoa Rice Krispie Bars, I’m reminded of why cooking and baking bring such joy – they create memories, spark conversations, and show the people we care about just how much they mean to us.
So gather your ingredients, put on your favorite music, and get ready to create something truly special. Your kitchen will smell amazing, your family will be impressed, and you’ll have a new go-to recipe that’s guaranteed to become a beloved favorite for years to come.

