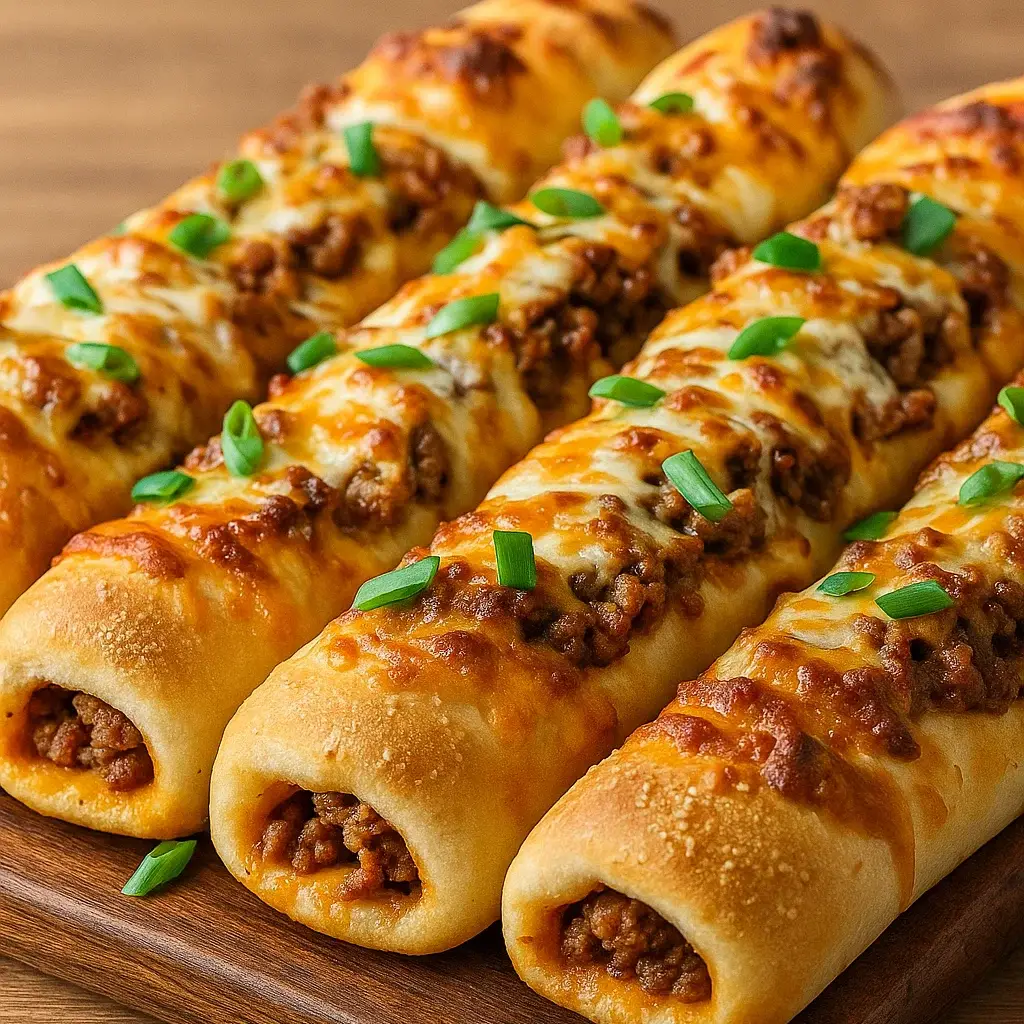
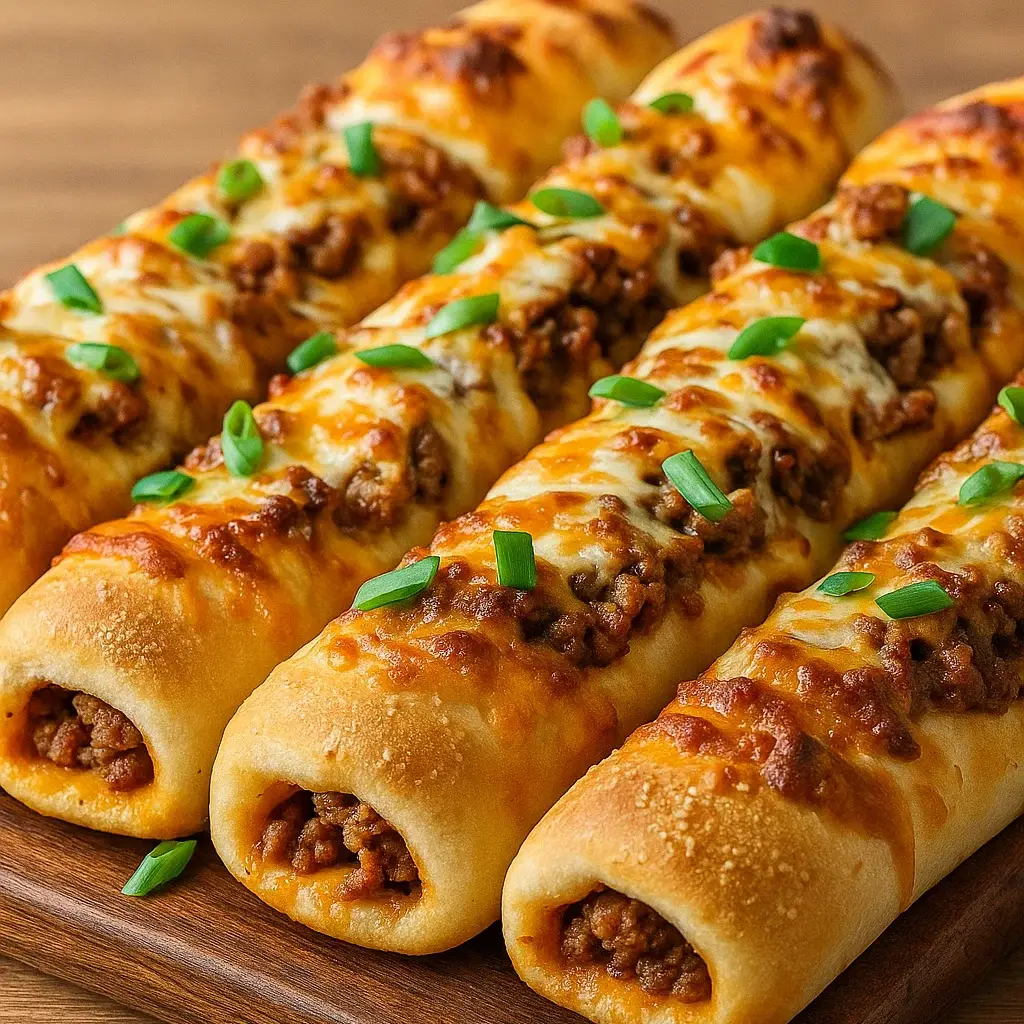
Prep Time: 20 minutes | Cook Time: 15 minutes | Total Time: 35 minutes | Serves: 8-10 people
I discovered the magic of cheesy taco breadsticks during a particularly chaotic Super Bowl party when I needed something that would feed a crowd without requiring constant attention. After watching an entire platter vanish in under ten minutes, I knew I had struck gold. These have since become my go-to recipe for every gathering, and the requests for the recipe never stop coming!
Why These Cheesy Taco Breadsticks Will Become Your Signature Dish
What makes these cheesy taco breadsticks so incredibly addictive isn’t just their amazing taste – it’s the perfect combination of textures and flavors that hit all the right notes. Unlike ordinary breadsticks that can be bland and boring, these beauties are packed with savory taco meat and gooey cheese in every single bite.
The Perfect Flavor Explosion: Each cheesy taco breadstick delivers a burst of seasoned beef, melted cheese, and herb-infused dough that creates the ultimate comfort food experience. The taco seasoning adds just the right amount of spice without overwhelming more sensitive palates.
Crowd-Pleasing Convenience: These cheesy taco breadsticks are incredibly easy to make using simple ingredients you probably already have on hand. No complicated techniques or special equipment required – just mix, roll, stuff, and bake!
Versatile Entertainment: Whether you’re hosting a casual movie night, throwing a game day party, or need an impressive appetizer for dinner guests, these cheesy taco breadsticks adapt to any occasion and always steal the show.
The Secret to Perfect Cheesy Taco Breadsticks
After making countless batches of cheesy taco breadsticks and fine-tuning every detail, I’ve discovered the techniques that guarantee perfect results every time:
Meat Preparation Mastery: The key to exceptional cheesy taco breadsticks starts with properly seasoned ground beef. Cooking the meat until it’s perfectly browned and letting it cool slightly prevents the dough from becoming soggy and makes assembly much easier.
Dough Handling Excellence: Working with pizza dough requires a gentle touch. Room temperature dough is easier to roll and shape, while cold dough can tear. The secret is letting it rest at room temperature for about 15 minutes before working with it.
Sealing Technique: The most crucial step in making cheesy taco breadsticks is properly sealing the edges. A little water on your fingertips helps seal the dough, and gentle pressure ensures no delicious filling escapes during baking.
Premium Ingredients for Outstanding Results
For the Flavorful Filling:
- 1 pound lean ground beef (80/20 blend works perfectly)
- 1 packet (1 ounce) taco seasoning mix (or homemade blend)
- 2 tablespoons water
- 8 ounces shredded Mexican cheese blend (the perfect melting combination)
- 6 colby jack cheese sticks, cut in half (creates that amazing cheese pull)
For the Perfect Dough Base:
- 1 tube (13.8 ounces) refrigerated pizza dough (I prefer Pillsbury)
- 4 tablespoons butter, melted (for that golden, rich exterior)
- 1 teaspoon garlic powder (adds incredible flavor depth)
- 1 teaspoon dried parsley (for color and freshness)
- 1/2 teaspoon kosher salt (enhances all the flavors)
For the Ultimate Serving Experience:
- 1 cup sour cream (for cooling contrast)
- 1 cup salsa (choose your preferred heat level)
- 1/2 cup guacamole (optional but highly recommended)
- 2 tablespoons fresh cilantro, chopped (for garnish)
Master-Level Instructions for Cheesy Taco Breadsticks Excellence
Preparing Your Kitchen and Ingredients:
Step 1: The Perfect Setup Preheat your oven to 425°F and line a large baking sheet with parchment paper. This temperature is crucial for achieving that perfect golden-brown exterior while ensuring the cheese melts completely inside your cheesy taco breadsticks. Position your oven rack in the center for even baking.
Step 2: Creating the Ultimate Taco Filling Heat a large skillet over medium-high heat and add the ground beef. Using a wooden spoon, break up the meat as it cooks, stirring frequently until it’s beautifully browned and no pink remains – this usually takes about 6-8 minutes. The key to exceptional cheesy taco breadsticks is ensuring your meat is well-browned for maximum flavor development.
Step 3: Seasoning Perfection Drain any excess fat from the beef, then return the skillet to the stove. Add the taco seasoning and water, stirring constantly until the meat is evenly coated and the mixture becomes fragrant – about 2 minutes. Remove from heat and let cool for 10 minutes. This cooling step is essential for successful cheesy taco breadsticks as hot filling can make the dough difficult to work with.
Mastering the Assembly Process:
Step 4: Dough Preparation Excellence Remove the pizza dough from the refrigerator and let it sit at room temperature for 15 minutes – this makes it much easier to work with. On a lightly floured surface, carefully unroll the dough and gently stretch it into a large rectangle, approximately 12×8 inches. The dough should be about 1/4 inch thick for perfect cheesy taco breadsticks.
Step 5: The Perfect Cut Using a sharp knife or pizza cutter, cut the dough in half lengthwise, then cut each half into 5 equal rectangles, creating 10 pieces total. Each rectangle should be roughly 4×2 inches – the ideal size for stuffing and rolling your cheesy taco breadsticks.
Step 6: The Art of Filling Place about 2 tablespoons of the cooled taco meat down the center of each dough rectangle, leaving about 1/2 inch border on all sides. Top each portion of meat with a generous sprinkle of shredded cheese, then place half a cheese stick on top. The combination of shredded cheese and cheese stick creates that amazing melty texture that makes these cheesy taco breadsticks so irresistible.
The Rolling and Sealing Magic:
Step 7: Perfect Rolling Technique Starting from one long side, carefully roll each rectangle over the filling, creating a log shape. The key to successful cheesy taco breadsticks is rolling firmly but gently – you want to encase the filling completely without tearing the dough.
Step 8: Sealing for Success Pinch the seam and both ends of each breadstick firmly to seal, ensuring no filling can escape during baking. Lightly dampen your fingertips with water if the dough isn’t sealing easily. Place each sealed breadstick seam-side down on your prepared baking sheet, spacing them about 2 inches apart.
The Finishing Touch:
Step 9: Creating the Golden Butter Mixture In a small bowl, combine the melted butter, garlic powder, parsley, and salt. Whisk until well combined – this aromatic mixture is what gives your cheesy taco breadsticks that beautiful golden color and incredible flavor.
Step 10: The Final Brush Using a pastry brush or clean kitchen brush, generously coat the top and sides of each breadstick with the butter mixture. Don’t skip this step – it’s what creates that gorgeous golden exterior and adds an extra layer of flavor to your cheesy taco breadsticks.
Step 11: Baking to Perfection Bake for 12-15 minutes, or until the breadsticks are golden brown and sound hollow when tapped. The cheese should be melted inside, and the dough should be cooked through. Let cool for 3-5 minutes before serving – this brief cooling period prevents burns while still serving your cheesy taco breadsticks deliciously warm.
Internal Link Section: Complete Your Party Spread
While these incredible cheesy taco breadsticks are absolutely perfect on their own, why not explore more amazing recipes that will create the ultimate party spread?
These hearty breadsticks pair wonderfully with our collection of perfect sides that complement Mexican-inspired flavors beautifully. From fresh veggie platters to creamy dips, these sides create the perfect balance with your cheesy taco breadsticks.
Love the bold flavors in this recipe? Discover our flavored dips and marinades section where you’ll find amazing salsas, creamy dips, and zesty sauces that pair perfectly with these breadsticks.
Keep the party going with our selection of refreshing beverages that complement rich, cheesy foods like these taco breadsticks. From fruity agua frescas to ice-cold sodas, these drinks balance the richness perfectly.
Looking for more crowd-pleasing appetizers? Our tasty snacks category features more party-perfect recipes that pair beautifully with these cheesy taco breadsticks for the ultimate spread.
When you want to build a complete meal around your appetizers, explore our hearty main dishes for satisfying options that complement the Mexican flavors in these breadsticks.
Balance your rich appetizers with our fresh, vibrant salads that provide a cooling contrast to the warmth and richness of cheesy taco breadsticks.
End your party on a sweet note with our irresistible desserts that provide the perfect finishing touch to any gathering featuring these amazing breadsticks.
For special occasions, browse our dinner delights that create memorable meals worthy of featuring these spectacular cheesy taco breadsticks as the star appetizer.
Start your party right with our breakfast favorites – these breadsticks even make an indulgent weekend brunch treat alongside your morning favorites.
Expert Tips for Cheesy Taco Breadsticks Success
Make-Ahead Magic: You can assemble these cheesy taco breadsticks up to 4 hours in advance and refrigerate them before baking. Just add an extra 2-3 minutes to the baking time if baking from cold.
Freezer-Friendly: Assembled but unbaked cheesy taco breadsticks freeze beautifully for up to 3 months. Bake directly from frozen, adding 5-7 extra minutes to the cooking time.
Ingredient Substitutions: Ground turkey or chicken work well as lighter alternatives to beef. You can also make vegetarian versions using seasoned black beans or lentils instead of meat.
Cheese Variations: While Mexican cheese blend and colby jack create the perfect combination, feel free to experiment with cheddar, monterey jack, or pepper jack for different flavor profiles in your cheesy taco breadsticks.
Customizing Your Cheesy Taco Breadsticks
Spice Level Adjustments: For milder breadsticks, use mild taco seasoning and regular cheese. For heat lovers, add diced jalapeños to the filling or use pepper jack cheese instead of colby jack.
Vegetable Additions: Finely diced bell peppers, onions, or corn can be sautéed with the meat for extra flavor and nutrition in your cheesy taco breadsticks.
Sauce Variations: While traditional dipping sauces are perfect, try serving with queso, ranch dressing, or even a spicy chipotle mayo for variety.
Size Options: Make mini versions using smaller dough rectangles for party appetizers, or create larger versions for meal-sized portions.
Storage and Reheating Tips
Store leftover cheesy taco breadsticks in the refrigerator for up to 3 days in an airtight container. To reheat, place them on a baking sheet and warm in a 350°F oven for 8-10 minutes, or until heated through and crispy again. Avoid microwaving as it can make the dough soggy.
Nutritional Benefits and Considerations
While these cheesy taco breadsticks are definitely an indulgent treat, they do provide protein from the beef and cheese, and carbohydrates for energy. For lighter versions, use lean ground turkey and reduced-fat cheese, or add extra vegetables to the filling.
Perfect Occasions for Cheesy Taco Breadsticks
These versatile cheesy taco breadsticks shine at game day parties, casual dinners, potluck gatherings, kids’ birthday parties, and family movie nights. They’re substantial enough to serve as a light meal and impressive enough for entertaining guests.
Troubleshooting Your Breadsticks
Dough Tears While Rolling: Let the dough come to room temperature and work gently. Patch small tears with extra dough if needed.
Filling Leaks Out: Ensure edges are well-sealed and don’t overfill. A light brush of water helps the dough stick together.
Uneven Browning: Rotate the baking sheet halfway through cooking for even browning on all your cheesy taco breadsticks.
Dough Too Sticky: Lightly flour your work surface and hands, but don’t over-flour as it can make the dough tough.
Final Thoughts on These Amazing Breadsticks
There’s something truly magical about pulling a tray of golden, aromatic cheesy taco breadsticks from the oven and watching everyone’s faces light up. These aren’t just appetizers – they’re conversation starters, crowd-pleasers, and memory-makers all rolled into one delicious package.
What I love most about these cheesy taco breadsticks is how they bring people together. Whether it’s kids fighting over the last one, adults sneaking seconds when they think no one’s looking, or guests asking for the recipe before they’ve even finished eating, these breadsticks create those special moments that make entertaining so rewarding.
The best part about mastering this cheesy taco breadsticks recipe is the confidence it gives you as a host. You know you have a guaranteed crowd-pleaser in your back pocket – something that looks impressive but is actually quite simple to make. It’s the kind of recipe that makes you look like a culinary genius while requiring minimal effort.
So preheat that oven, roll up your sleeves, and get ready to create some seriously delicious memories with these incredible cheesy taco breadsticks. Fair warning: you might want to double the recipe because trust me, one batch is never enough!

