Prep Time: 15 minutes | Cook Time: 30 minutes | Chill Time: 2 hours | Total Time: 2 hours 45 minutes
There’s something absolutely magical about transforming creamy, comforting mac and cheese into golden, crispy bites that deliver the perfect contrast of textures. This crispy fried mac and cheese recipe takes your favorite comfort food to new heights, creating an irresistible appetizer or indulgent meal that’ll have everyone asking for seconds.
What Makes This Crispy Fried Mac and Cheese Special
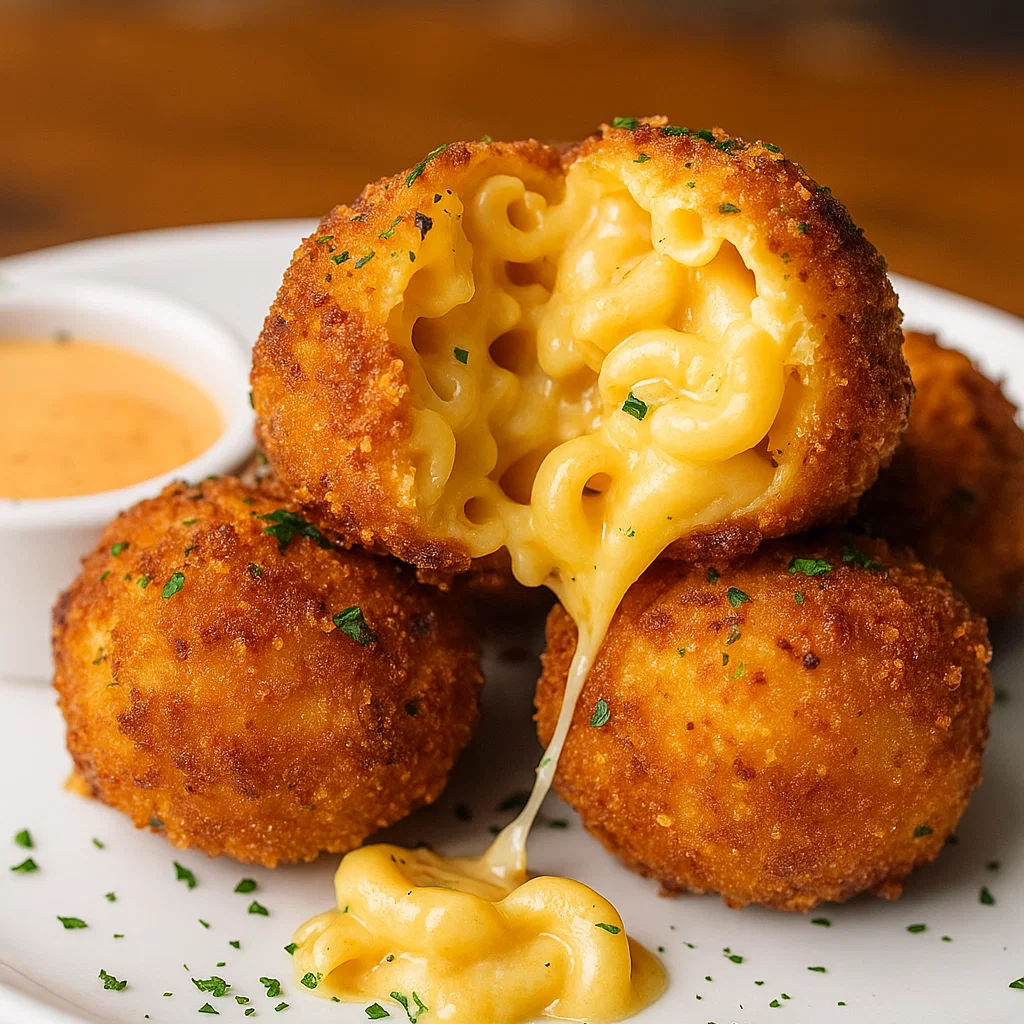
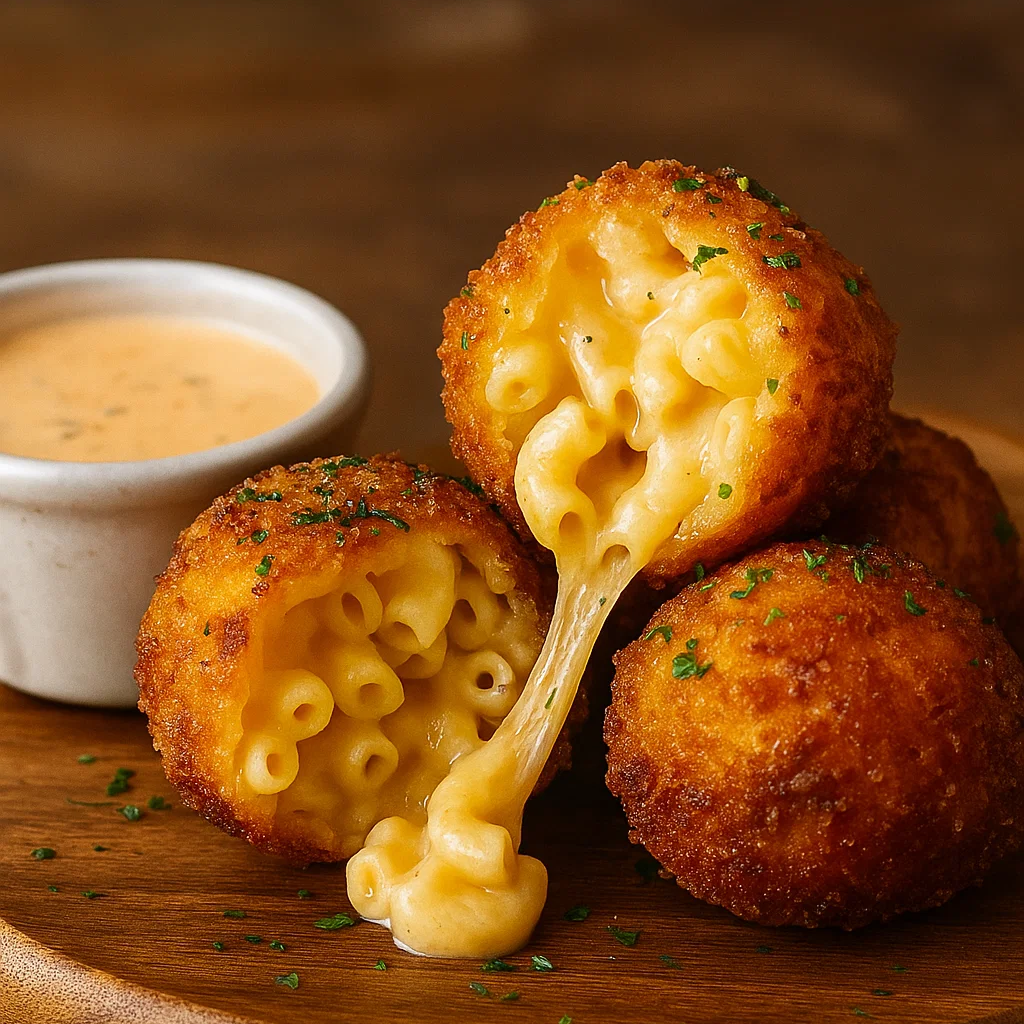
When you bite into these golden treasures, you’ll experience the satisfying crunch of perfectly seasoned breadcrumbs giving way to an incredibly creamy, cheese-loaded center. The secret lies in creating the ideal mac and cheese base that holds together beautifully when fried, while maintaining that molten cheese interior we all crave.
Ingredients for Perfect Crispy Fried Mac and Cheese
For the Mac and Cheese Base:
- 1 pound elbow macaroni pasta – The classic choice for its ability to hold cheese sauce
- 4 tablespoons unsalted butter – Creates the foundation for our rich roux
- 1/4 cup all-purpose flour – Essential for thickening the cheese sauce
- 3 cups whole milk, warmed – Provides the creamy base for our sauce
- 2 cups sharp cheddar cheese, freshly grated – The star of our cheese blend
- 1 cup Gruyère cheese, freshly grated – Adds sophisticated nutty flavors
- 1/2 cup Parmesan cheese, grated – Enhances the overall cheese complexity
- 1 teaspoon salt – Brings out all the flavors
- 1/2 teaspoon black pepper – Adds a subtle kick
- 1/4 teaspoon paprika – For a hint of warmth and color
For the Coating and Frying:
- 2 cups panko breadcrumbs – Creates the ultimate crispy exterior
- 1 cup all-purpose flour – First layer of our coating system
- 3 large eggs, beaten – Helps the breadcrumbs adhere perfectly
- Vegetable oil for frying – Enough for deep frying (about 6-8 cups)
- Salt to taste – For seasoning the finished product
Step-by-Step Instructions for Crispy Fried Mac and Cheese
Preparing the Mac and Cheese Base
Step 1: Cook the Pasta to Perfection Start by bringing a large pot of salted water to a rolling boil. The water should taste like the ocean – this is crucial for properly seasoned pasta. Add the elbow macaroni and cook for exactly 2 minutes less than the package directions suggest. We want the pasta slightly underdone since it will continue cooking when we fry it later. Drain the pasta and rinse with cold water to stop the cooking process immediately.
Step 2: Create the Ultimate Cheese Sauce In a large, heavy-bottomed saucepan, melt the butter over medium heat until it becomes fragrant and slightly golden. This step adds depth to our sauce. Whisk in the flour and cook for about 2 minutes, stirring constantly to create a smooth roux. You’ll know it’s ready when it smells nutty and turns a light golden color.
Gradually add the warmed milk, whisking continuously to prevent any lumps from forming. This is where patience pays off – add the milk slowly, about 1/2 cup at a time, whisking vigorously after each addition. Continue cooking until the sauce thickens enough to coat the back of a spoon, approximately 5-7 minutes.
Step 3: Add the Cheese Magic Remove the saucepan from heat – this is important to prevent the cheese from becoming grainy. Add the grated cheddar, Gruyère, and Parmesan cheeses gradually, whisking after each addition until completely melted and smooth. Season with salt, pepper, and paprika. The sauce should be incredibly creamy and coat a spoon beautifully.
Step 4: Combine and Chill Fold the cooked macaroni into the cheese sauce, ensuring every piece is well-coated. Transfer the mixture to a shallow, wide dish and spread it evenly. Cover with plastic wrap, pressing it directly onto the surface to prevent a skin from forming. Refrigerate for at least 2 hours, though overnight is even better. This chilling step is crucial for the mixture to firm up enough to form into balls.
Crispy Fried Mac and Cheese
Creating the Crispy Coating
Step 5: Form Perfect Balls Once the mac and cheese mixture is well-chilled and firm, use a cookie scoop or your hands to form uniform balls about the size of golf balls. Place them on a parchment-lined baking sheet. If the mixture feels too soft, pop it back in the refrigerator for another 30 minutes.
Step 6: Set Up Your Coating Station Arrange three shallow dishes: one with flour, one with beaten eggs, and one with panko breadcrumbs. This assembly line approach makes the coating process smooth and efficient.
Step 7: Coat Each Ball Perfectly Working with one ball at a time, roll it first in flour, shaking off any excess. Next, dip it in the beaten eggs, ensuring it’s completely covered. Finally, roll it in the panko breadcrumbs, pressing gently to help them adhere. Place the coated balls back on the parchment-lined baking sheet.
The Frying Process
Step 8: Heat Your Oil In a large, heavy pot or deep fryer, heat the vegetable oil to exactly 350°F. Use a thermometer to monitor the temperature – this is crucial for achieving the perfect crispy exterior without burning the breadcrumbs.
Step 9: Fry to Golden Perfection Carefully lower 3-4 balls into the hot oil using a slotted spoon. Don’t overcrowd the pot, as this will lower the oil temperature. Fry for 3-4 minutes, turning them gently with a slotted spoon to ensure even browning. They should emerge golden brown and crispy all over.
Step 10: Drain and Serve Transfer the fried mac and cheese balls to a paper towel-lined plate to drain excess oil. Season immediately with a pinch of salt while they’re still hot. Serve immediately while the exterior is crispy and the cheese center is molten.
Pro Tips for the Best Crispy Fried Mac and Cheese
Use Freshly Grated Cheese: Pre-shredded cheese contains anti-caking agents that prevent smooth melting. Taking the extra time to grate your own cheese makes an enormous difference in texture and flavor.
Don’t Skip the Chilling: The refrigeration step isn’t optional – it’s what allows the mixture to hold together during frying. Rush this step, and you’ll end up with a mess in your fryer.
Maintain Oil Temperature: Keep that oil at a steady 350°F. Too hot, and the breadcrumbs will burn before the center heats through. Too cool, and you’ll get greasy, soggy results.
Crispy Fried Mac and Cheese
Work in Batches: Resist the temptation to fry everything at once. Overcrowding drops the oil temperature and results in uneven cooking.
Perfect Pairings and Serving Suggestions
These crispy fried mac and cheese balls are versatile enough to serve as an appetizer at your next gathering or as the star of a comfort food feast. Consider pairing them with:
- Fresh Vibrant Salads to balance the richness
- Flavored Dips and Marinades like spicy ranch or honey mustard
- Refreshing Beverages to cleanse the palate
For a complete meal, serve alongside Perfect Sides like roasted vegetables or a crisp coleslaw. They also make an excellent addition to your Dinner Delights repertoire.
Storage and Reheating Tips
Refrigerator Storage: Leftover crispy fried mac and cheese can be stored in the refrigerator for up to 3 days in an airtight container.
Freezing: Before frying, you can freeze the formed and coated balls for up to 3 months. Fry directly from frozen, adding an extra minute or two to the cooking time.
Crispy Fried Mac and Cheese
Reheating: For best results, reheat in a 375°F oven for 8-10 minutes rather than using the microwave, which will make them soggy.
Creative Variations
Bacon Lovers: Add 1/2 cup of crispy, crumbled bacon to the cheese sauce for an extra layer of flavor.
Spicy Kick: Mix in diced jalapeños or a dash of hot sauce to the cheese mixture.
Herb Enhancement: Fresh thyme or chives folded into the mac and cheese base adds a gourmet touch.
Different Shapes: Instead of balls, try forming them into logs or squares for a different presentation.
Why This Recipe Works Every Time
The success of this crispy fried mac and cheese lies in the balance of techniques and quality ingredients. By creating a properly thickened cheese sauce, allowing adequate chilling time, and maintaining correct frying temperature, you achieve that perfect contrast of textures that makes this dish so irresistible.
The combination of three cheeses provides complexity without being overwhelming, while the panko breadcrumbs create an exceptionally crispy coating that stays crunchy even as the cheese center melts to perfection.
Crispy Fried Mac and Cheese
Make It Your Signature Dish
This crispy fried mac and cheese recipe is destined to become one of your most requested dishes. Whether you’re hosting a casual get-together, preparing Tasty Snacks for game day, or creating memorable Breakfast Favorites (yes, these work for brunch too!), this recipe delivers restaurant-quality results every single time.
The beauty of this dish lies not just in its incredible taste, but in how it brings people together. There’s something about that first bite – the satisfying crunch giving way to creamy, cheesy bliss – that creates an instant moment of joy and connection around the table.
Crispy Fried Mac and Cheese
Final Thoughts
Crispy fried mac and cheese represents everything we love about comfort food: familiar flavors elevated to new heights, impressive presentation that’s actually achievable at home, and that perfect combination of textures that keeps us coming back for more. This recipe proves that with the right techniques and quality ingredients, you can create restaurant-worthy dishes in your own kitchen.
Don’t wait for a special occasion to try this recipe – everyday moments deserve this kind of deliciousness. Whether you’re adding it to your collection of Hearty Main Dishes or keeping it in your back pocket for when you need an impressive appetizer, this crispy fried mac and cheese will never disappoint.
Serves: 6-8 as an appetizer or 4 as a main dish Nutritional Information: Approximately 420 calories per serving
Keywords: crispy fried mac and cheese, fried mac and cheese balls, comfort food recipe, cheese appetizer, homemade mac and cheese, crispy coating recipe


