If you’ve ever craved the perfect combination of crispy, golden cutlets and fluffy rice topped with that irresistible sweet-savory sauce, then Japanese katsu bowls are about to become your new obsession. This beloved Japanese comfort food delivers an explosion of textures and flavors that transforms simple ingredients into something truly magical.
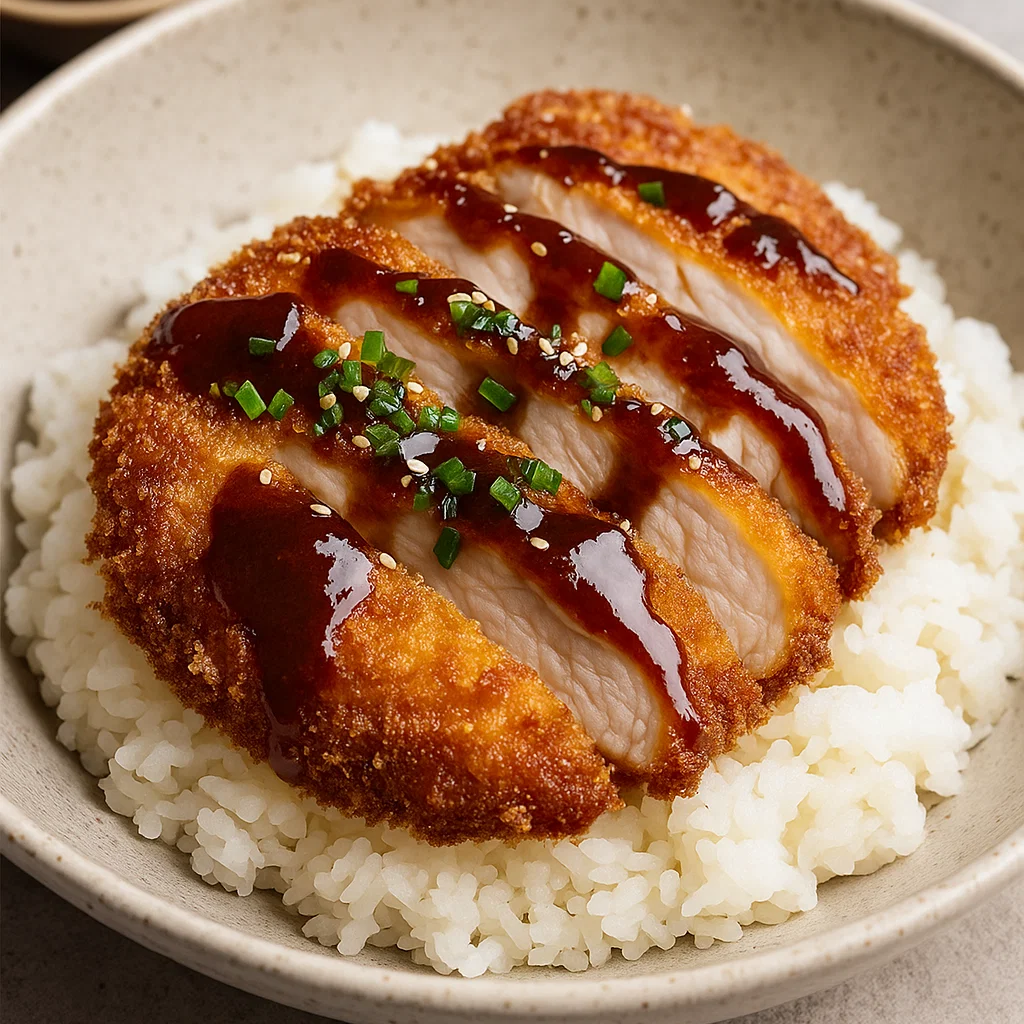
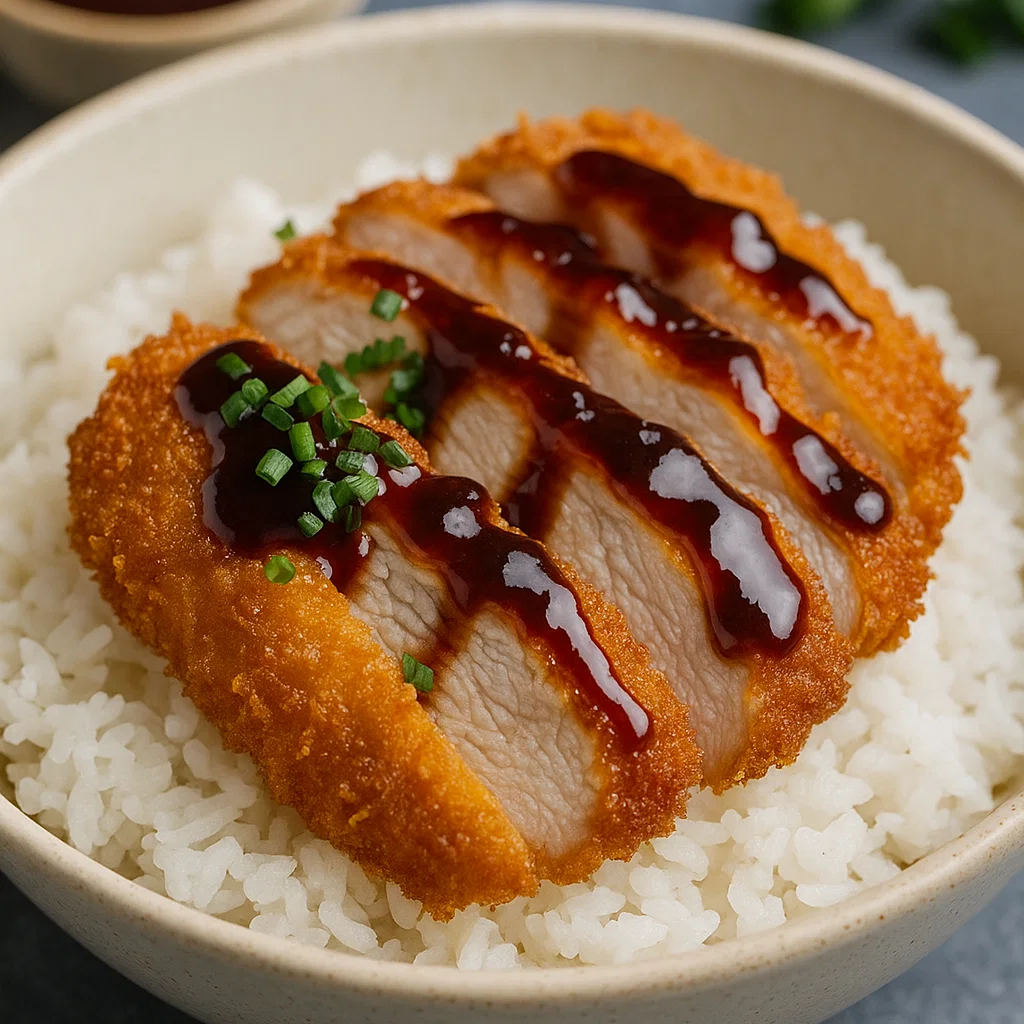
There’s something incredibly satisfying about cutting into a perfectly crispy katsu cutlet and watching the golden panko coating give way to tender, juicy meat underneath. When paired with steaming rice and drizzled with homemade tonkatsu sauce, Japanese katsu bowls create a dining experience that feels both indulgent and comforting—yet surprisingly achievable in your own kitchen.
What Makes Japanese Katsu Bowls So Special?
Japanese katsu bowls represent the perfect marriage of texture and taste. The crispy panko-breaded cutlet provides a delightful crunch that contrasts beautifully with the soft, sticky rice below. The tonkatsu sauce brings everything together with its unique blend of sweet, tangy, and savory notes that complement the rich fried protein.
Unlike heavy, greasy fried foods, properly made Japanese katsu bowls feel light yet satisfying. The secret lies in using authentic Japanese panko breadcrumbs, which create an airy, delicate coating that doesn’t overwhelm the dish. This technique has been perfected over generations, making Japanese katsu bowls a true testament to culinary craftsmanship.
Essential Ingredients for Perfect Japanese Katsu Bowls
For the Katsu Cutlets:
- 2 large boneless chicken breasts (or pork loin), about 1 pound total
- 2 cups Japanese panko breadcrumbs – This is absolutely crucial for authentic texture
- 1 cup all-purpose flour
- 3 large eggs, beaten
- 1 teaspoon salt
- ½ teaspoon black pepper
- 2 cups vegetable oil for frying
For the Rice Base:
- 2 cups short-grain Japanese rice (sushi rice works perfectly)
- 2½ cups water
- Pinch of salt
For the Homemade Tonkatsu Sauce:
- ⅓ cup ketchup
- 2 tablespoons Worcestershire sauce
- 1 tablespoon soy sauce
- 1 tablespoon brown sugar
- 1 teaspoon Dijon mustard (optional, for extra depth)
For Garnish and Assembly:
- 3 green onions, finely chopped
- 1 cup shredded cabbage (optional but traditional)
- Sesame seeds for sprinkling
Step-by-Step Instructions for Restaurant-Quality Japanese Katsu Bowls
Preparing the Perfect Rice Foundation
Start by rinsing your Japanese rice under cold water until the water runs completely clear—this removes excess starch and ensures fluffy, separate grains. In a medium saucepan, combine the rinsed rice with water and a pinch of salt. Bring to a boil, then reduce heat to low, cover tightly, and simmer for 18 minutes. Remove from heat and let stand, covered, for 10 minutes before fluffing with a fork.
Creating the Ideal Katsu Cutlets
Begin by placing your chicken breasts between plastic wrap and gently pounding them to an even ½-inch thickness using a meat mallet or rolling pin. This ensures uniform cooking and prevents the edges from drying out while the center finishes cooking. Season both sides generously with salt and pepper, allowing the seasoning to penetrate the meat for maximum flavor.
Set up your breading station like a professional kitchen: arrange three shallow dishes in a row. Fill the first with flour, the second with beaten eggs, and the third with panko breadcrumbs. This assembly line approach keeps everything organized and prevents cross-contamination.
Working with one cutlet at a time, dredge it thoroughly in flour, shaking off any excess. Next, dip it completely in the beaten eggs, allowing excess to drip off for about 5 seconds. Finally, press the cutlet firmly into the panko breadcrumbs, ensuring complete coverage. I like to sprinkle extra panko on top and press gently to create an extra-thick, crispy coating.
Achieving the Perfect Golden Fry
Heat your vegetable oil in a heavy-bottomed pan or deep skillet to exactly 340°F—this temperature creates that perfect golden crust without burning. Test the oil by dropping a few panko crumbs into it; they should immediately sizzle and float to the surface.
Carefully place the breaded cutlets into the hot oil, being careful not to overcrowd the pan. Fry for 3-4 minutes on the first side until deep golden brown, then flip and cook for another 3-4 minutes. The internal temperature should reach 165°F for chicken or 145°F for pork. Transfer to a paper towel-lined plate and let rest for 2 minutes to allow excess oil to drain while maintaining crispiness.
Crafting the Signature Tonkatsu Sauce
While your cutlets are resting, whisk together all the tonkatsu sauce ingredients in a small bowl. Taste and adjust the sweetness or acidity according to your preference—some people prefer a slightly sweeter sauce, while others enjoy more tang from the Worcestershire sauce.
Assembly: Bringing It All Together
Slice your rested katsu cutlets into strips about ¾-inch wide, revealing the beautiful contrast between the golden crust and tender interior. Serve immediately over bowls of warm rice, arranging the sliced cutlets in an overlapping pattern. Drizzle generously with the homemade tonkatsu sauce and sprinkle with chopped green onions and sesame seeds.
Pro Tips for Japanese Katsu Bowl Success
The key to exceptional Japanese katsu bowls lies in attention to detail. Always use authentic Japanese panko breadcrumbs—their light, airy texture is irreplaceable for achieving that signature crunch. Don’t skip the meat-pounding step, as it ensures even cooking and prevents tough, chewy cutlets.
Temperature control is crucial during frying. If your oil is too hot, the coating will burn before the meat cooks through. Too cool, and your cutlets will absorb oil and become greasy. A kitchen thermometer is your best friend for consistent results.
For meal prep enthusiasts, you can bread your cutlets up to 24 hours ahead and refrigerate them covered. However, for optimal crispiness, fry them just before serving.
Delicious Variations and Serving Suggestions
Traditional Japanese katsu bowls pair beautifully with crisp cucumber salad dressed in rice vinegar and sesame oil. For a complete restaurant experience, consider adding a small bowl of miso soup and some lightly pickled vegetables.
Transform your leftover katsu into amazing sandwiches by placing sliced cutlets between soft bread with shredded cabbage and extra tonkatsu sauce—it’s like having a taste of Tokyo right at home.
For those watching their calories, try the baked version: spray breaded cutlets with cooking oil and bake at 400°F for 20-25 minutes, flipping halfway through.
Perfect Pairings from Our Recipe Collection
Enhance your Japanese katsu bowls experience with these complementary dishes from our extensive recipe collection:
- Perfect Sides – Discover authentic Japanese sides like miso soup and pickled vegetables that traditionally accompany katsu bowls
- Flavored Dips & Marinades – Explore variations of tonkatsu sauce and other Asian-inspired dipping sauces
- Refreshing Beverages – Find the perfect Japanese teas and cold drinks to cleanse your palate
- Tasty Snacks – Try edamame and other light appetizers that complement rich katsu bowls
- Hearty Main Dishes – Explore more substantial Japanese dishes for special occasions
- Fresh Vibrant Salads – Create refreshing cucumber and cabbage salads that balance the richness of fried katsu
- Dinner Delights – Browse our complete collection of satisfying dinner recipes
Storage and Reheating Tips
Store leftover katsu cutlets and rice separately in airtight containers in the refrigerator for up to 3 days. Never microwave the cutlets, as this will make the coating soggy. Instead, reheat them in a 350°F oven for 8-10 minutes to restore their crispy texture.
The rice can be quickly reheated in the microwave with a splash of water to restore moisture and fluffiness.
Why Japanese Katsu Bowls Should Be Your Next Cooking Adventure
These Japanese katsu bowls represent everything wonderful about comfort food—they’re satisfying without being overwhelming, exotic yet approachable, and impressive enough for company while simple enough for a weeknight dinner. The combination of crispy textures, umami-rich flavors, and visual appeal makes them a perfect addition to any home cook’s repertoire.
Whether you’re new to Japanese cuisine or a longtime enthusiast, mastering Japanese katsu bowls opens the door to a world of delicious possibilities. The techniques you’ll learn—proper breading, temperature control, and sauce balancing—will serve you well in countless other recipes.
Take the plunge and create these restaurant-quality Japanese katsu bowls in your own kitchen. With each crispy, flavorful bite, you’ll understand why this dish has captured hearts around the world and earned its place as a true comfort food classic.
Enjoy your homemade Japanese katsu bowls with confidence, knowing you’ve mastered one of Japan’s most beloved comfort foods!

